Teamscale Integration with IntelliJ
Teamscale integrates with IntelliJ IDEA and many other IntelliJ IDEs, such as PyCharm and WebStorm. Before installing the Teamscale Integration for IntelliJ, make sure its system requirements are met.
Installing the Plug-in
Depending on your needs, there are several options to install the Teamscale Integration for IntelliJ.
Installing the Latest Version From the Jetbrains Marketplace (recommended)
For most users, installing the latest version of the plug-in from the Jetbrains Marketplace is recommended.
- Select File > Settings from the IDE's menu bar.
- Select Plugins.
- Search for
Teamscale Integrationin the Marketplace. - Click the Install button.
- Restart the IDE to conclude the installation.
Installing Any Version From the CQSE Website
Unlike the Jetbrains Marketplace, the CQSE website offers both the latest version and older versions of the plug-in.
- Select File > Settings from the IDE's menu bar.
- Select Plugins.
- Select Manage Plugin Repositories from the cogwheel menu.
- Add the desired plugin repository.
- Latest Version:
https://downloads.teamscale.com/ide/intellij/latest/updatePlugins.xml - Older Version:
https://downloads.teamscale.com/ide/intellij/vM.N.x/updatePlugins.xml(replacingM.Nby the feature version you need but keeping the.x, e.g.,7.8.x)
- Latest Version:
- Search for
com.teamscale.ide.intellij. - Click the Install button.
- Restart the IDE to conclude the installation.
Installing While Offline
In case you cannot reach the Jetbrains Marketplace or CQSE Website during the installation, e.g., due to a security policy, you can perform an offline installation.
- Download an archive of the plugin repository from the CQSE website.
- Latest Version:
https://downloads.teamscale.com/ide/intellij/latest/teamscale-intellij-plugin-repository.zip - Specific Version:
https://downloads.teamscale.com/ide/intellij/vM.N.x/teamscale-intellij-plugin-repository.zip(replacingM.Nby the feature version you need but keeping the.x, e.g.,7.8.x)
- Latest Version:
- Transfer the downloaded archive to your offline computer and unpack it there.
- Select File > Settings from the IDE's menu bar.
- Select Plugins.
- Select Install Plugin from Disk from the cogwheel menu.
- Select the
com.teamscale.ide.intellijZIP archive file inside the unpacked archive (not the plugin repository archive itself). - Click the Install button.
- Restart the IDE to conclude the installation.
Connecting to Teamscale
After installing the plug-in, you need to perform the following actions to configure a Teamscale server:
Open the IntelliJ settings via the menu File > Settings.
Expand Tools (1) and select Teamscale (2) on the left hand side.
Use the + button to add a new Teamscale server (3).
In the details (4) fill the URL for the server, and your Username and IDE Access Key
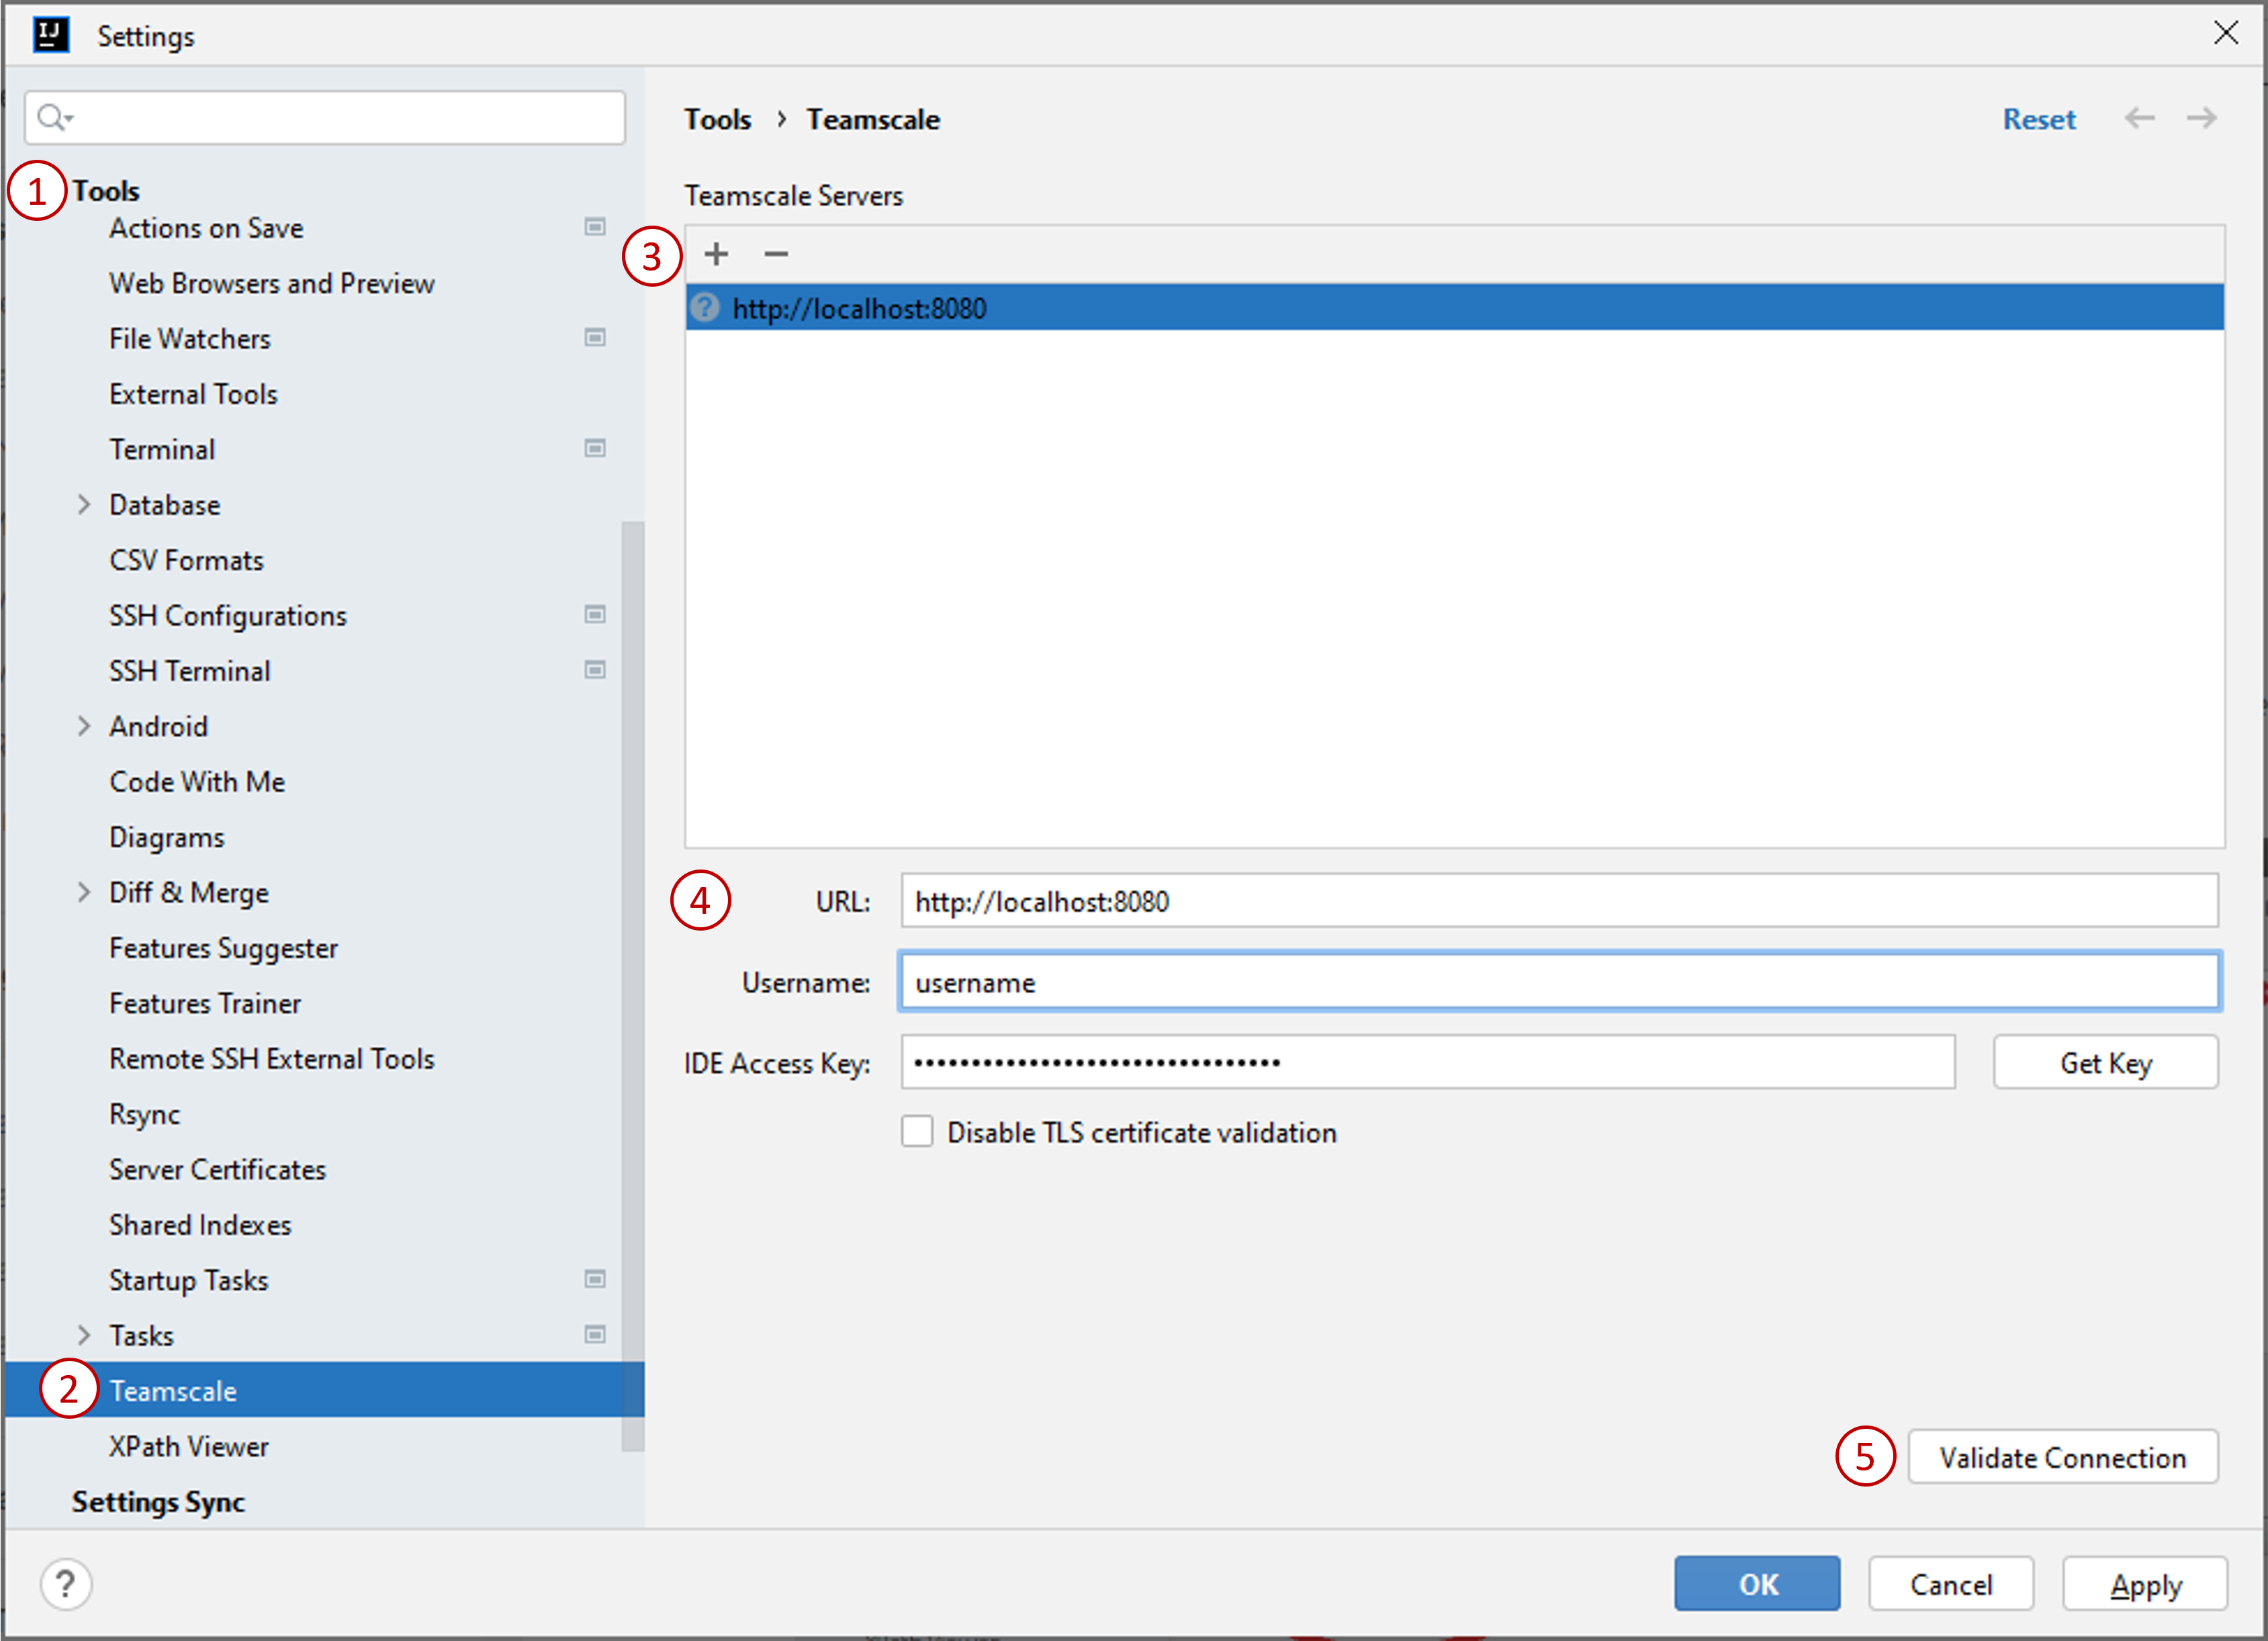
By clicking on the Get Key button, you can navigate to the Teamscale web interface and generate a personal access key.
Click the Validate Connection (5) button to ensure successful connection the Teamscale server. Click Apply and OK to save the settings.
Configuring Using .teamscale.toml Files
In addition to connecting to a Teamscale server, the local project needs to be mapped to the project(s) on the Teamscale server. Since Teamscale 8.3, this is done using one or more .teamscale.toml configuration files in a simple, uniform file format (.teamscale.toml).
Fetching Findings
To check if everything is configured correctly, open the Findings tool window via the menu (View > Tool Windows > Findings):
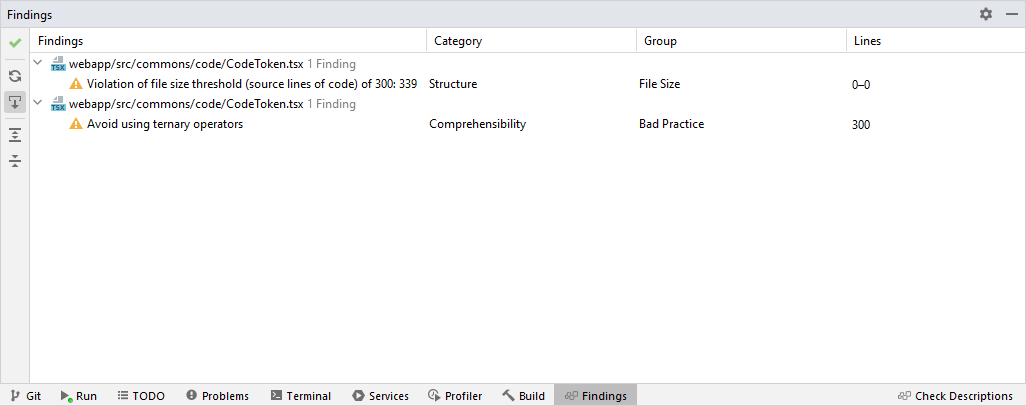
Now you can select any resource that has findings and wait for findings to appear in the Findings tool window. The symbol on the top of the left hand side of the tool window will indicate the server's reachability state. Hover the mouse over the icon to get additional information. A click on the icon opens up the Teamscale settings.
Refreshing Findings
In order to get an updated view of the findings of a selected folder or a file after changes in a file system, for instance by switching to a new repository or branch, click the Refresh findings button in the Findings tool window.
Performing Pre-Commit Analysis
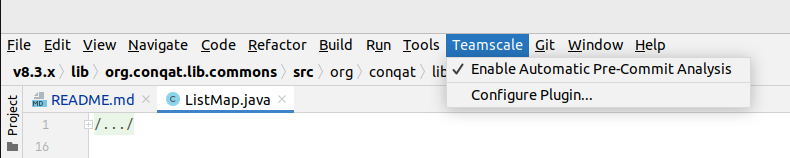
The IntelliJ plug-in can be used to analyze changes prior to committing them to the repository. This functionality is called pre-commit analysis. The findings of these pre-commits are shown as any other finding in the Findings tool window. The Automatic Pre-Commit Analysis option under the Teamscale tab must be enabled:
The pre-commit analysis is started automatically when you do one of the following actions:
- Open a file in the editor
- Switch to an already open file in the editor
- Save the file currently active editor
- Save all open files
Under the hood, Teamscale treats these changes as a commit on a new, virtual branch: your pre-commit branch. IntelliJ will poll the Teamscale server until analysis of this commit is done. Once analysis is finished, Teamscale will show the findings from your pre-commit branch.
Note that, by default, the Teamscale server enforces some limits on the pre-commit branch w.r.t. to the number of files that may be included in each pre-commit. These limits exist so that one overly large pre-commit upload does not disproportionately delay analysis of other commits. More information is available here .