Teamscale Integration for Visual Studio
Teamscale integrates with Visual Studio. Before installing the Teamscale Integration for Visual Studio, make sure its system requirements are met.
Installing the Extension
Depending on your needs, there are several options to install the Teamscale Integration for Visual Studio.
Installing the Latest Version From the Visual Studio Marketplace (recommended)
For most users, installing the latest version of the plug-in from the Visual Studio Marketplace is recommended.
- Select Extensions > Manage Extensions.
- Search for
Teamscale. - Select Download.
- Restart the IDE to conclude the installation.
Installing While Offline
In case you cannot reach the Visual Studio Marketplace during the installation, e.g., due to a security policy, you can perform an offline installation.
- Download the plug-in from the Visual Studio Marketplace.
- Visual Studio 2022:
https://marketplace.visualstudio.com/items?itemName=CQSEGmbH.Teamscale-2022 - Visual Studio 2019:
https://marketplace.visualstudio.com/items?itemName=CQSEGmbH.Teamscale
- Visual Studio 2022:
- Double-click the Teamscale.vsix file.
- In the VSIX installer dialog, click Install.
- Restart Visual Studio.
Connecting to Teamscale
In Visual Studio, you need to configure your Teamscale server, so that the plug-in knows where to fetch findings. Servers are configured in the Teamscale Options dialog and this can be launched in any of the two ways:
Either:
- Click Extensions menu > Teamscale > Teamscale Options.
Or:
- Click View menu > Other Windows > Teamscale Findings.
- Click the Options Icon in the top left corner of the findings window.
The Teamscale server menu should now open where you can add your Teamscale server.
Click Add.
In the dialog, enter a Name for your server (this name is later referenced from project mappings), the server URL, your Username and Access Key.
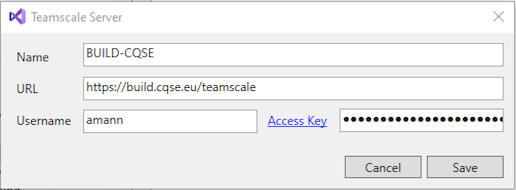
Click Save. The dialog should close, if validation of the connection was successful.
Configuring Solutions and Projects
Since Teamscale version 8.9.0, the Visual Studio extension now uses the TOML configuration file format for storing folder mappings. Project mappings in the old format are automatically migrated to the TOML format. This new format makes it easy to configure Solution folders (i.e. folders that contain the .sln file), Project folders (i.e., folders that contain the .csproj file) as well as other folders provided they contain code files analyzed by a Teamscale server.
In order to configure a VS Solution, keep in mind that VS Solutions may include VS Projects from different locations on your computer. This may require a VS Solution and its constituent Projects to be configured separately. For a start,
- Identify the VS Solution or Project in the IDE you wish to configure.
- Right-click on the Solution or Project node in the Solution Explorer > Open folder in File explorer.
- Create a
.teamscale.tomlfile in the folder according to this format providing values from your Teamscale instance and your local IDE setup.
Inspecting Findings
After the previous steps have been completed successfully you should now be able to explore findings in your code.
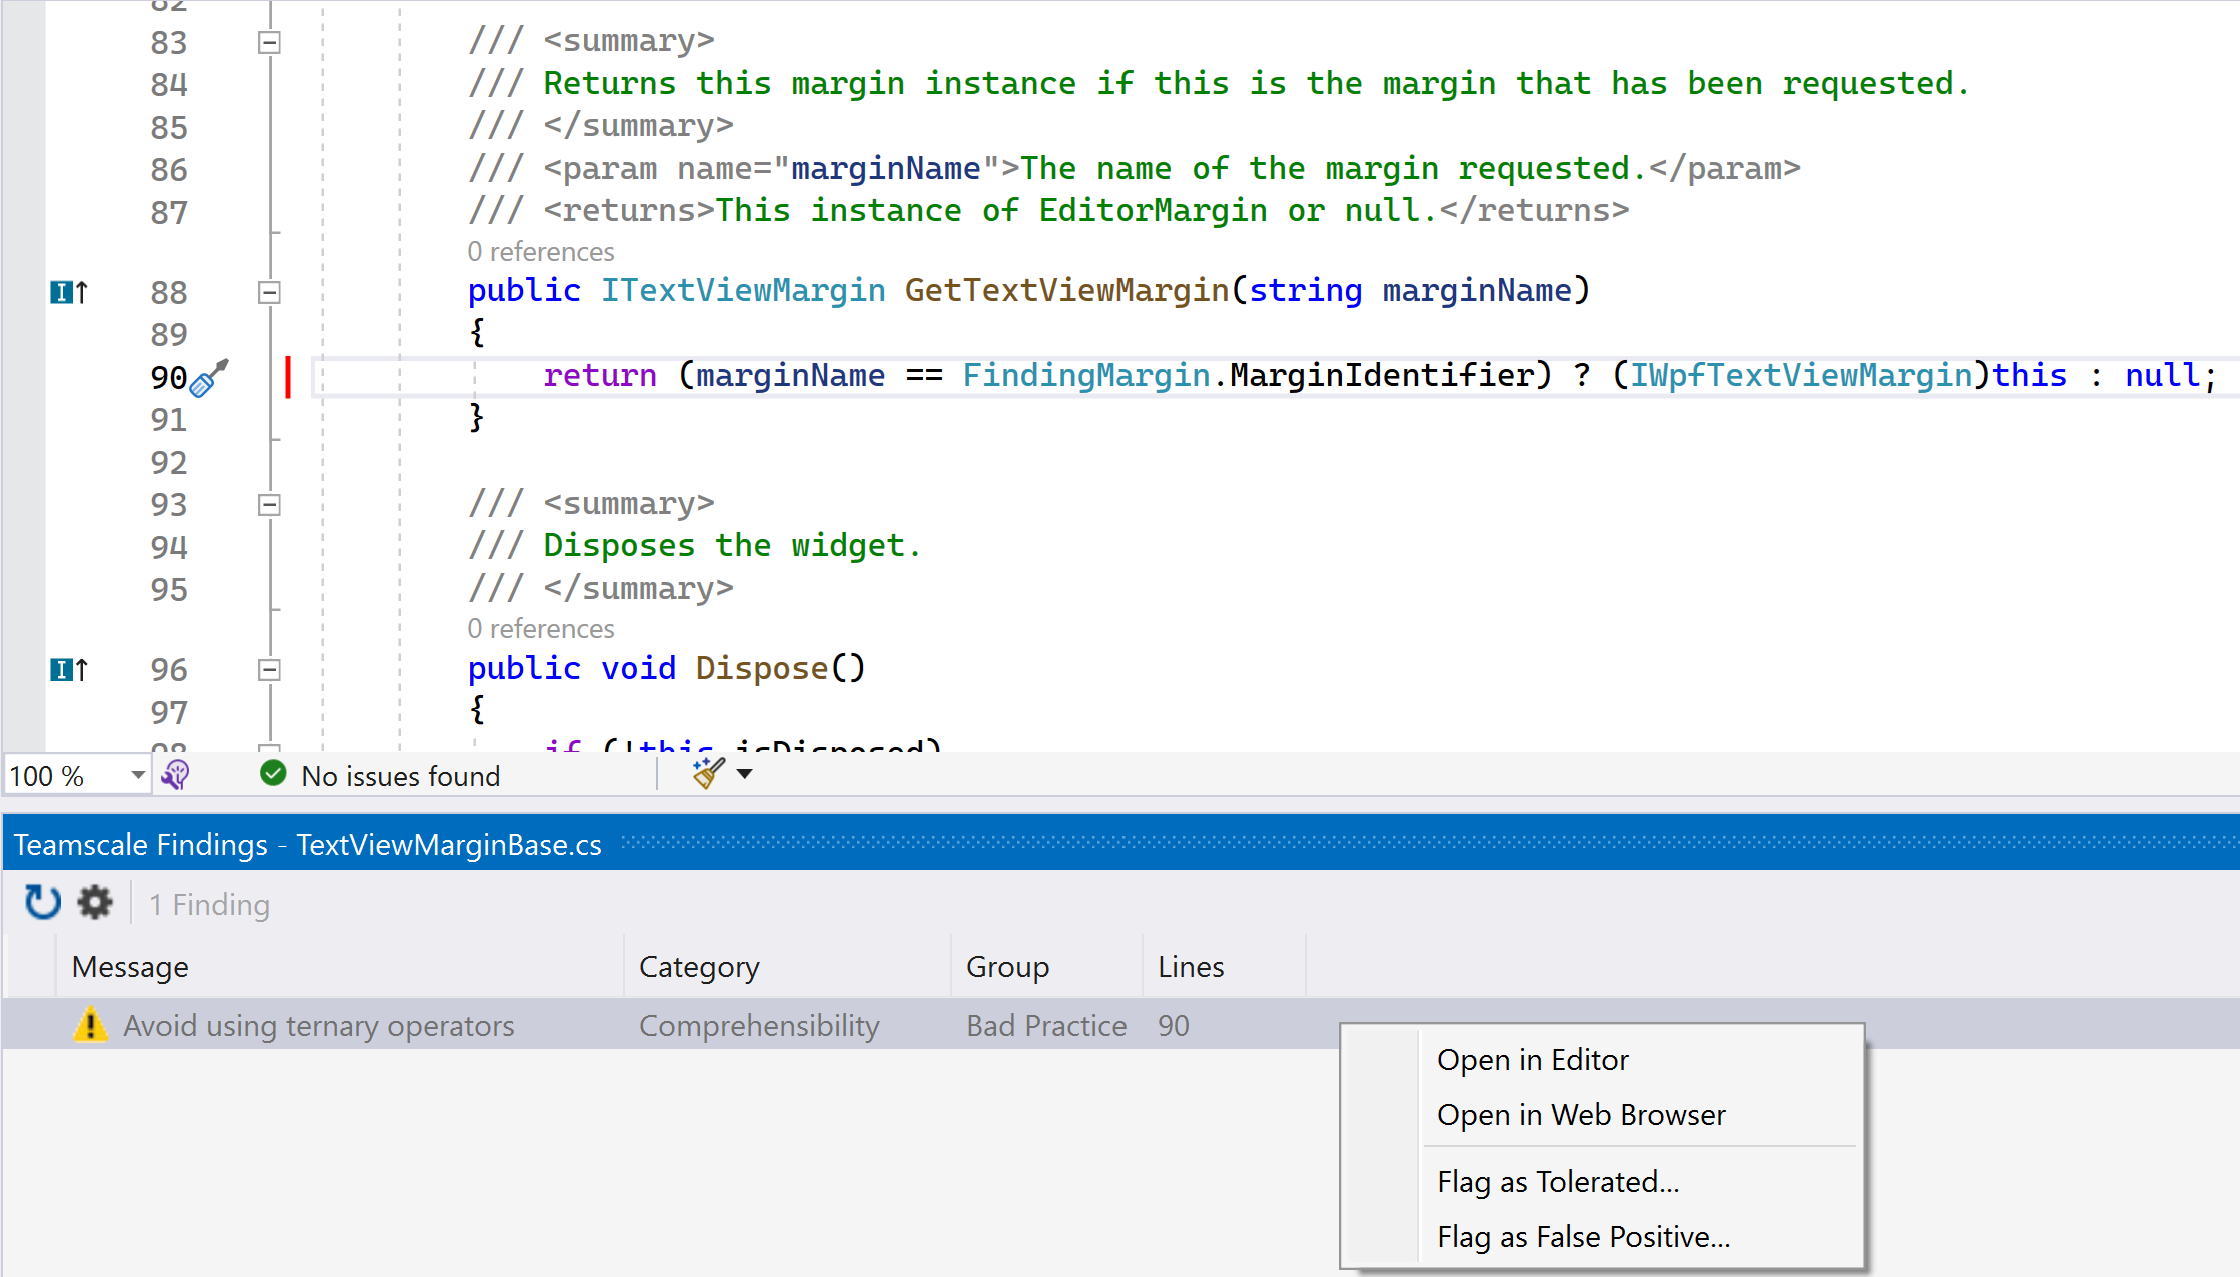
- Findings in the opened document should be marked with a red bar on the left margin.
- Hovering with the mouse over the margin will show a tooltip containing the description of the finding.
- To show all findings of a file, either right click in the current editor or the Solution Explorer and select Teamscale > Show Findings.
- In the findings window, one can double-click to jump to the finding in the code, open it in the browser, or mark the finding as shown in the screenshot below.
Pre-Commit Analyses
Beginning with version 9.1, automatic pre-commit analyses is now possible in the Visual Studio extension. This feature is enabled by default and can be controlled in the IDE through the setting under the Extensions main menu as seen below:

Different from the behavior in previous versions where pre-commit analyses had to be explicitly requested, pre-commit analyses are automatically started in the IDE after
- opening a file
- switching between the frames/tabs of opened files
- one or more opened files are saved
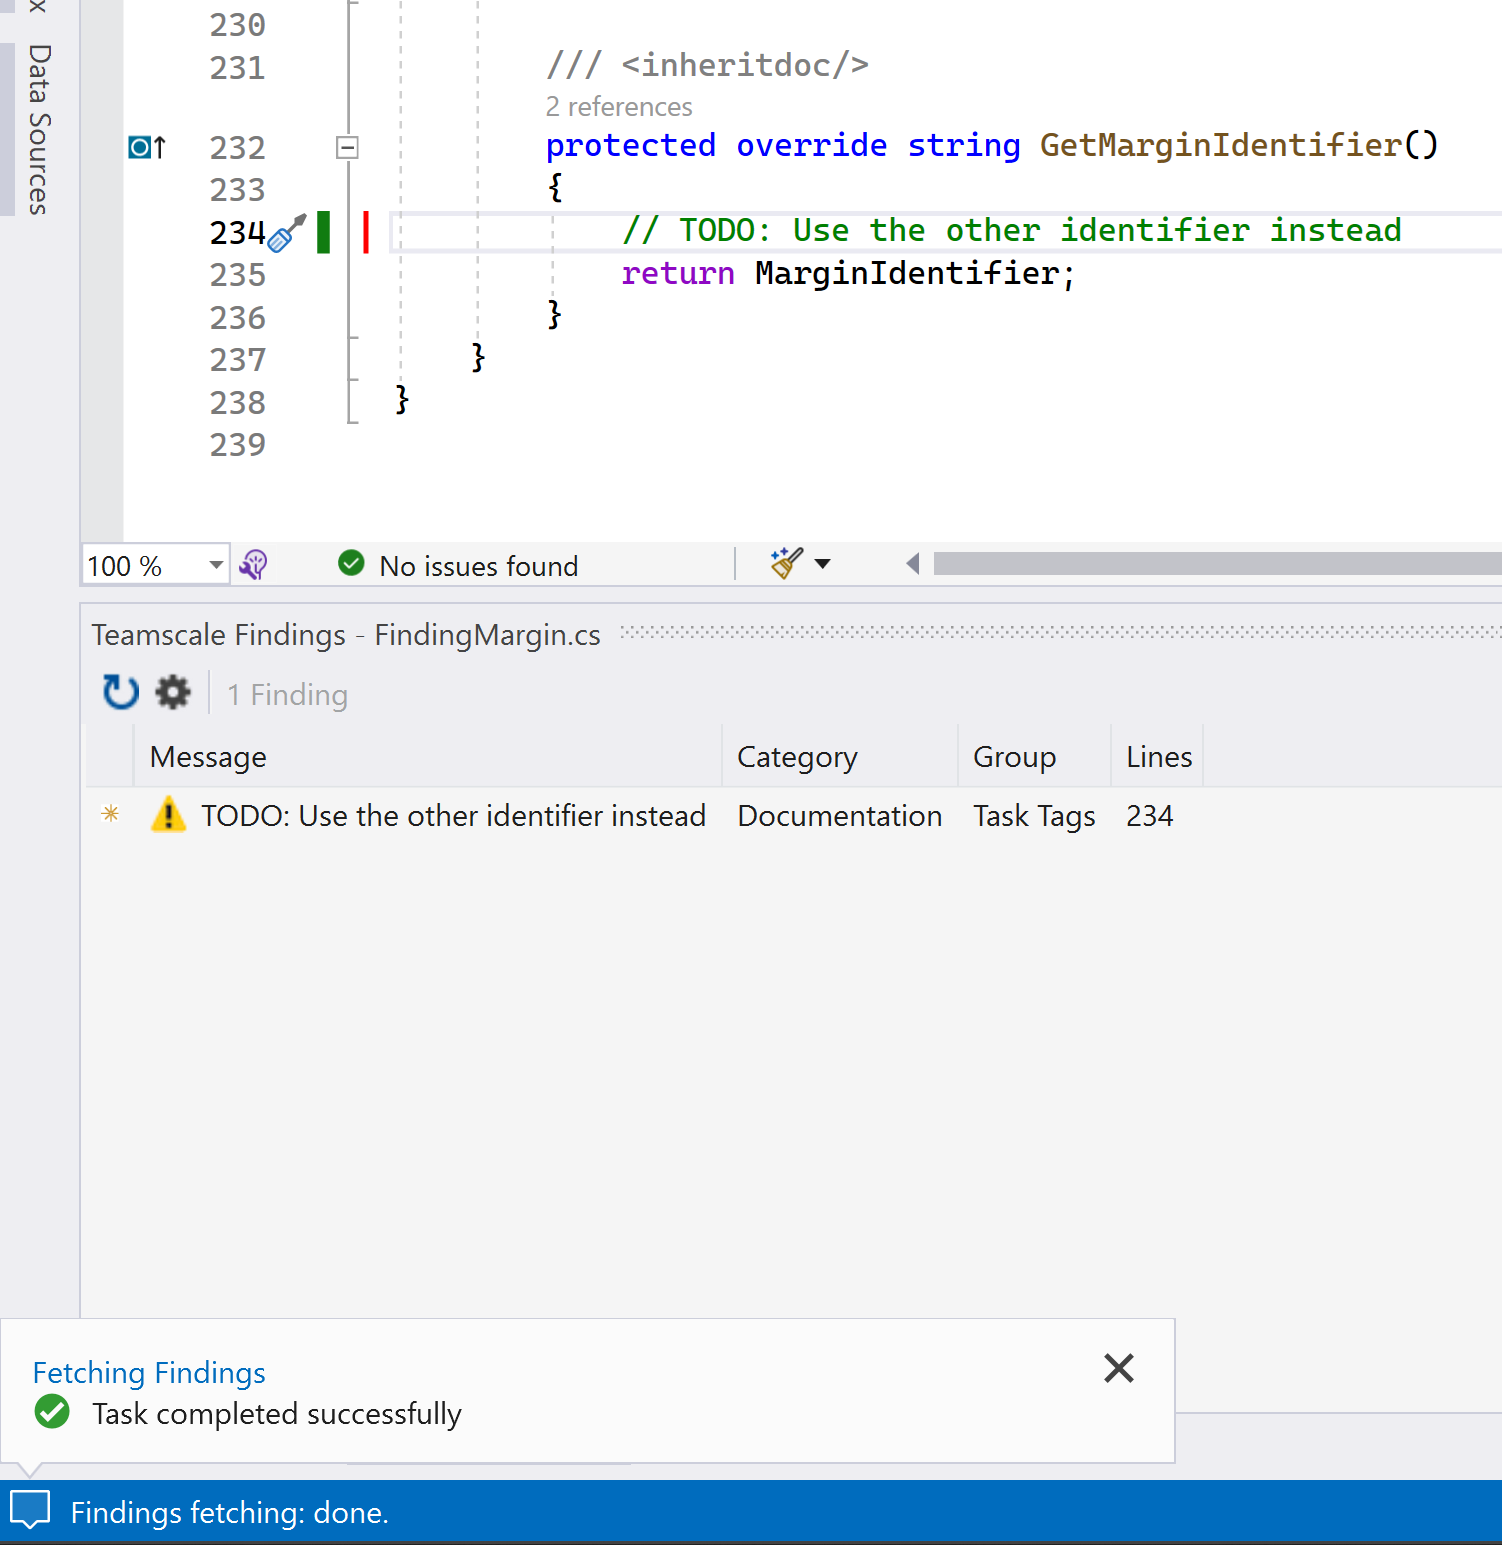
Under the hood, these changes are treated as a commit on a new virtual branch: your pre-commit branch, which is visible in Teamscale on the web browser. While automatic pre-commit analyses is in progress, its status can be monitored in the Findings windows view as well as in the IDE's Task Status Center at the extreme bottom left. Clicking the Status Center displays the running analyses with the possibility of cancellation.
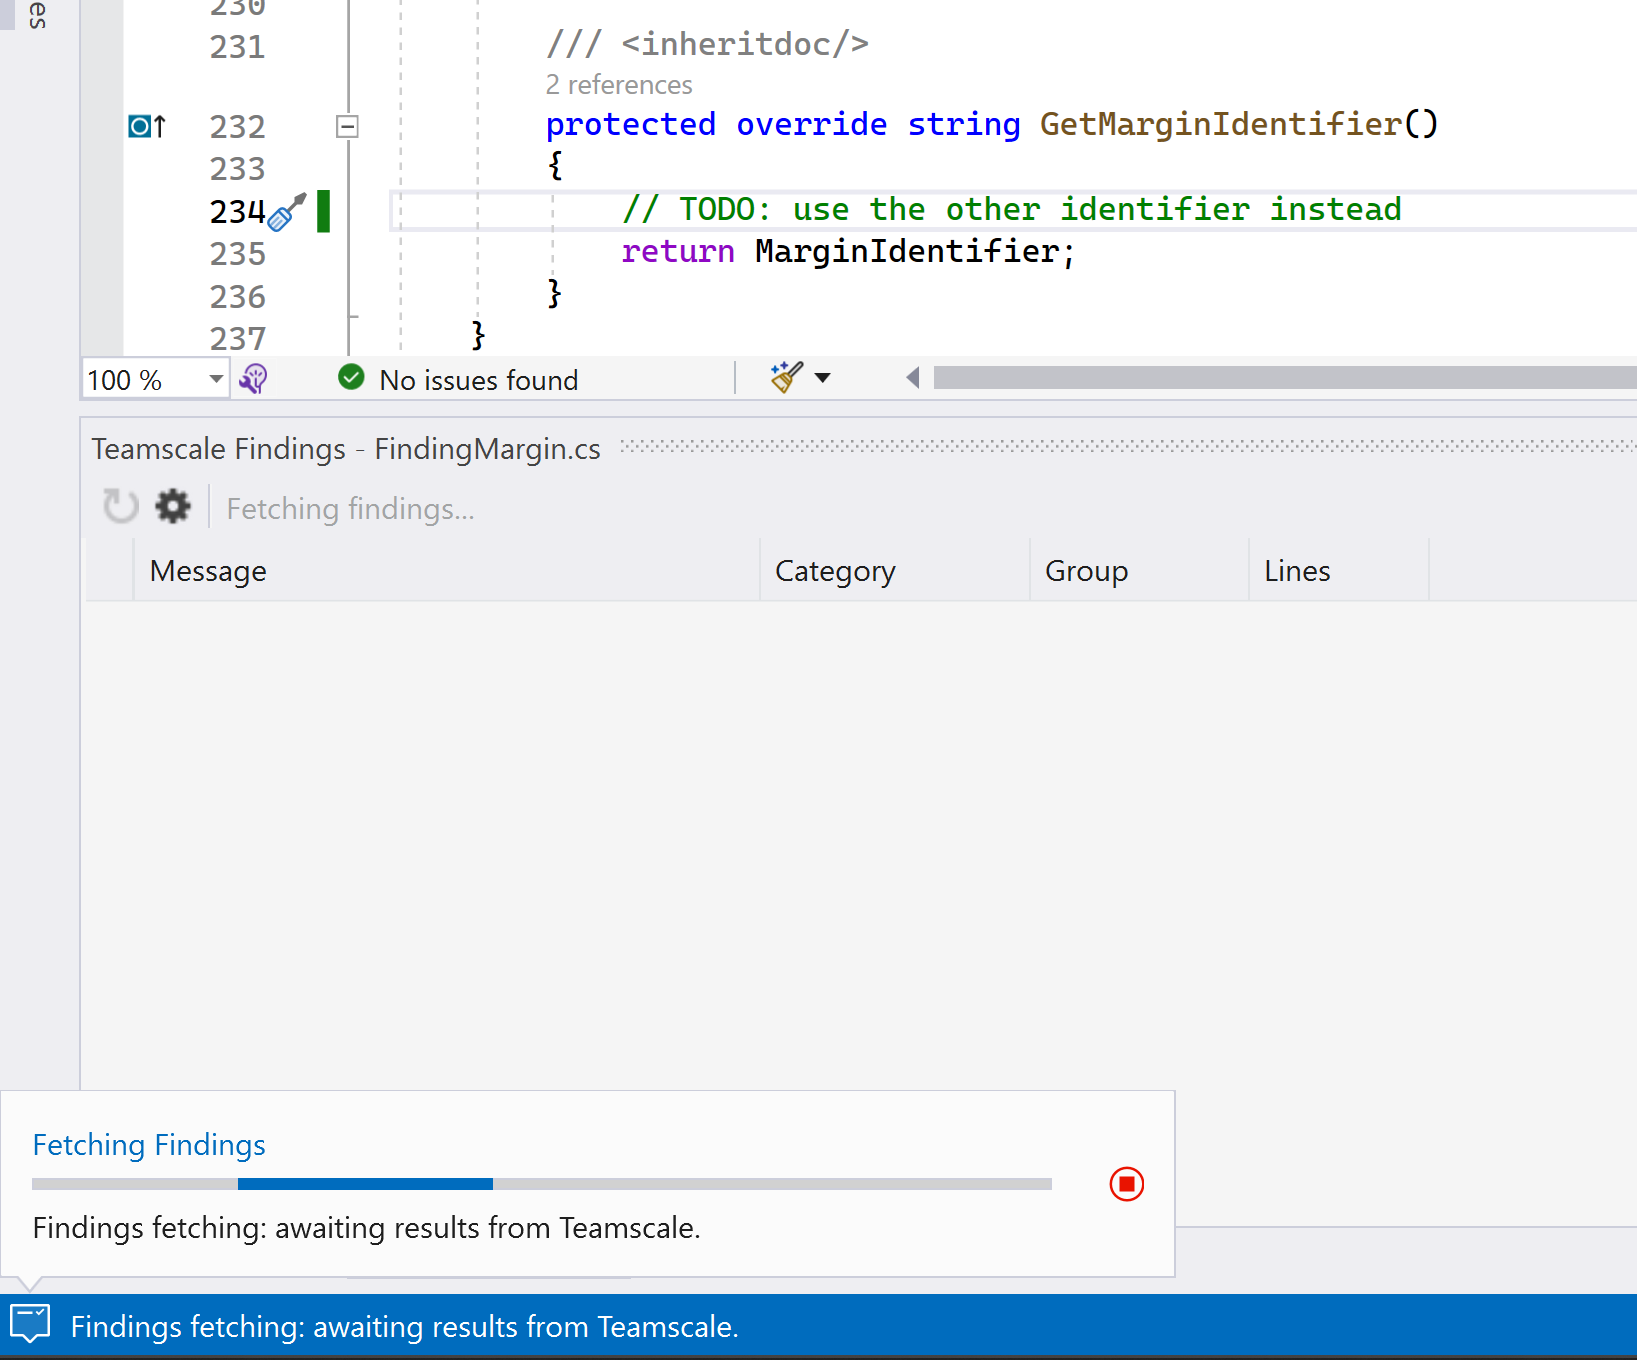
If the analyses take longer, the extension will repeatedly poll Teamscale until they are finished and results available. At the completion of analyses, the findings from Teamscale are shown in the Findings window like any other findings. New findings are specially marked.
Note that, by default, the Teamscale server enforces some limits on the pre-commit branch with respect to the number of files that may be included in each pre-commit. These limits exist so that one overly large pre-commit request does not disproportionately delay the analyses of other commits, whether pre-commits by other users or regular. More information is available here.
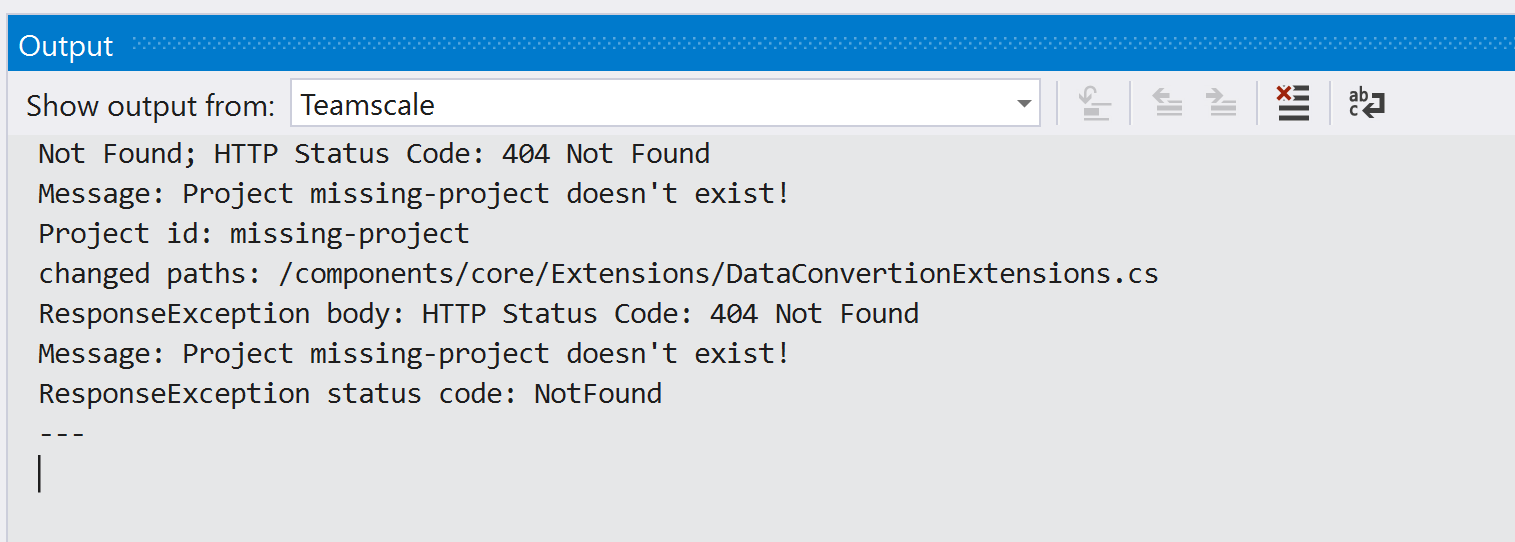
Common Error Messages
Starting with version 9.1, there is now a Teamscale output pane that is available only when some error occurred during the extension's communication with a Teamscale server. The output pane displays very detailed error messages to help to understand what might have gone wrong.
Error messages in the finding window
File, {File}, is outside a configured solution folder, i.e. no '.teamscale.toml' file in folder hierarchy of this file
- In the VS IDE, trace the file through its folder hierarchy to the parent Solution or Project folder.
- Check that the
.teamscale.tomlfile exists and has the right file extension (.toml). In case it has the wrong file extension (e.g.,.toml.txt), rename the file. - If steps 1-2 are not effective, the extension may not be authorized to read the file due to permission issues. Check that the VS IDE is run using the proper Windows account with sufficient permissions.
- If the previous steps still don't work, use the Troubleshooting section to send us logs for investigation.
Unknown Teamscale server 'https://path/to/teamscale' specified in Teamscale config in 'some/local/path/to/.teamscale.toml'
This unknown URL needs to be configured according to the steps in section Connecting to Teamscale.
Invalid Teamscale config file 'some/local/path/to/.teamscale.toml'
The indicated .teamscale.toml file could not be parsed. Check for unclosed square brackets in sections, unclosed double quotes and missing equality signs in specification of fields and values.
Troubleshooting
Problems with the Visual Studio integration can be troubleshooted by enabling logging.
- Start Visual Studio with the
/logcommand-line switch:devenv.exe /log vslog.xml - Reproduce the error
- Errors will be logged in
vslog.xml
If you did not specify a log file, the default one located at %APPDATA%\Microsoft\VisualStudio\<Version>\ActivityLog.xml will be used.