How to Connect Teamscale's Issue Tracker to GitHub via App
Teamscale integrates with GitHub via the GitHub App. This is used to connect Github for issue tracking purposes. The guide for connecting the code on GitHub via an App can be found here.
General Option Reference
This guide only covers the options specific to the GitHub issue tracker via App. A general overview of connector options is available here.
Prerequisites for GitHub integration
Prerequisites for the configuration are:
- Teamscale installation that can be reached from the GitHub instance you want to connect to.
- GitHub organization account used to register and install the GitHub App.
Organization Account Required for SSO
If you plan to use the Use GitHub for Single Sign-On (SSO) option, you must install the GitHub App on a GitHub organization account, not a user account. User account installations do not support SSO authentication. This is a security requirement to ensure proper organization membership verification.
Installation of the Teamscale GitHub App
Ensure that the Teamscale instance base URL is configured correctly.
In GitHub, navigate to the settings page of your organization. Open Developer Settings > GitHub Apps and click the button New GitHub App. Here you can provide a name and details of your app. The following fields are relevant for Teamscale:
User authorization callback URL: This is the public URL of your Teamscale installation followed by api/github/oauth. So for the Teamscale URL https://teamscale.example.com, this would be https://teamscale.example.com/api/github/oauth.Setup URL: Should be left empty.Webhook URL: This is the public URL of your Teamscale installation followed by api/github/web-hook. So for the Teamscale URL https://teamscale.example.com, this would be https://teamscale.example.com/api/github/web-hook.Webhook secret: While this is optional, it is a good idea to place a random string in here. Remember this string for later usage in Teamscale.Repository permissions:- Issues: Read & write
- Metadata: Read-only (the default)
Organization permissions:- Members: Read-only
Account permissions:- E-mail addresses: Read-only
Subscribe to events:- Issues
Still in GitHub, you now have to generate a private key for your application. This can be done in the section Private keys in the general settings of your GitHub App. Download and save the key for later.
Back in Teamscale, go to
GitHub Integrationon the settings page and fill the fields as follows:GitHub URL: Enter the URL of your GitHub installation. For the public GitHub instance use https://github.com/.ID of the GitHub app: This value can be found at the top of the settings page of your GitHub App (App ID).Application private key: Enter the private key you just downloaded in step 3.Secret used for securing webhook calls: This is the webhook secret you configured in step 2. If you did not use a webhook secret, leave this empty.OAuth client id: This value can be found at the top of the settings page of your GitHub App (Client ID).OAuth client secret: This value can be found at the top of the settings page of your GitHub App (Client secret).Use GitHub for Single sign-on: Check this box if you want to allow users to log into Teamscale using their GitHub account.Organization Account Required for SSO
Use GitHub for Single Sign-On (SSO)requires the GitHub App to be installed on an organization account (see prerequisites above).Allowed Organizations for SSO: This must be set if you want to use single sign-on. Enter the name(s) of the GitHub organization(s) whose members are allowed to log in. Please refer to the reference article for more information.Create a new user on first login: Check this box if you want users that log into Teamscale using GitHub but do not have a Teamscale account yet to be created automatically.
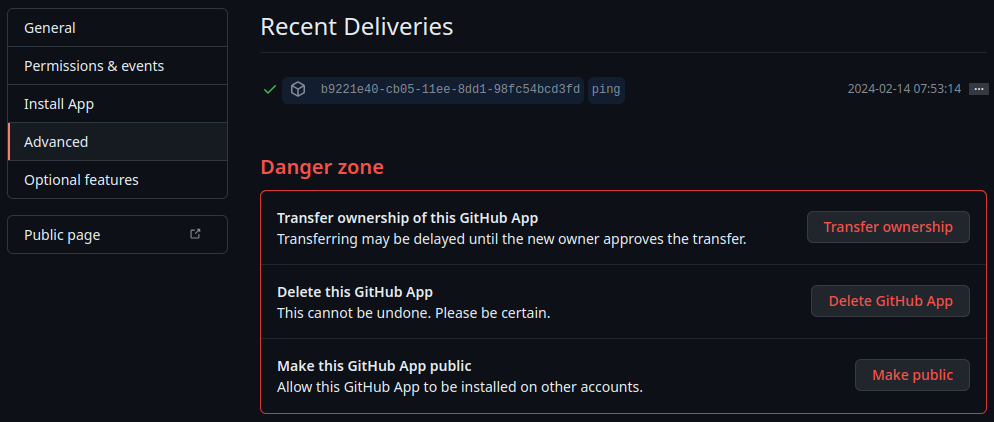
In Github, go back to the settings page of your GitHub App and switch to the Advanced tab. Check the Recent Deliveries. There should be a successful ping attempt in the list.
To install this GitHub App for your repository, navigate to the settings page of the GitHub App and select Install App.
Setup of the Github Connector
In Teamscale, go Project Configuration > Projects and edit or create a project. Click on the Issue Tracker button and choose Github (app based) as your Issue Tracker.

Fill out the following fields in the connector settings:
GitHub Server URL: The same URL given in 4. in section Installation of the Teamscale GitHub App.Repository Path: The path to the repository with the desired issues, in the form of {Repository} or {User}/{Repository}.
Click Save Project and wait for the finished reanalysis.
The issues can be found under Activity > Issues.