How to Connect Teamscale to Azure DevOps Git
![]()
Teamscale integrates with Azure DevOps Server and Azure DevOps Services using the available API and web hooks. No changes to Azure DevOps admin settings are required.
General Option Reference
This guide only covers the options specific for the Azure DevOps Git repository connector. A general overview of connector options is available here.
Organization, Project and Repository
Git URLs in Azure DevOps usually look like this: https://dev.azure.com/{organization}/{project}/_git/{repository}.
It is common to work on one or more projects within a single organization. Each project can have multiple Git repositories. The default Git repository has the same name as the project.
Make sure you identify the relevant parts of the repository you want to connect to before starting with this How-To.
Configuring Azure DevOps
Create a technical user that Teamscale can use to connect to Azure DevOps. It must have the Edit Subscriptions and View Subscriptions permissions. By default, these permissions are only granted to Project Administrators. Teamscale uses these permissions to create web hooks in Azure DevOps. If you cannot grant these permissions to the Teamscale user, you must manually create the webhooks.
Create an access token for this user with the Read & Write and Status permissions for the Code scope.
Azure DevOps Server
If you have enabled Basic Authentication in your IIS, personal access tokens will not work. Use username and password instead.
Microsoft recommends turning Basic Authentication off.
Configuring Teamscale
Ensure that the Teamscale instance base URL is configured correctly.
Select the Azure DevOps Git connector during project creation.
Select or create an account for the Azure DevOps instance. The account's fields should be filled out as follows:
The URI is set according to the type of the Azure DevOps instance:
- Azure DevOps Services:
https://dev.azure.com/{organization} - Azure DevOps Server:
https://{instance}/{collection}
In most cases, leave the Username field empty and enter the access token you created above into the Password field. However, if you connect to Azure DevOps Server and configured it to accept authentication via username and password, enter the username and password into these fields.
- Azure DevOps Services:
Set the Repository Path to the name of the Azure DevOps project and repository separated by a slash:
{project}/{repository}Even if the project and repository names are the same, the input must be in above format (e.g.,MyProject/MyProject).
Azure DevOps Server: authentication not supported
If you receive the error message authentication not supported it is likely that authentication against the Git repository is tried with NTLM instead of HTTP Basic. There are two workarounds for this:
- recommendedPrefer Basic authentication over NTLM in Teamscale by passing the
-Dhttp.auth.preference="basic"JVM argument to Teamscale. Use an access token in Teamscale. - Or enable Basic authentication in IIS Settings. However, this is not recommended by Microsoft. Use username and password in Teamscale.
As the first step during project creation, Teamscale will register its web hook with the Azure DevOps Server. After this, Teamscale will automatically be informed about events in the project, such as pushes to the repository and changes to pull requests.
Configuring Teamscale as a Required Check
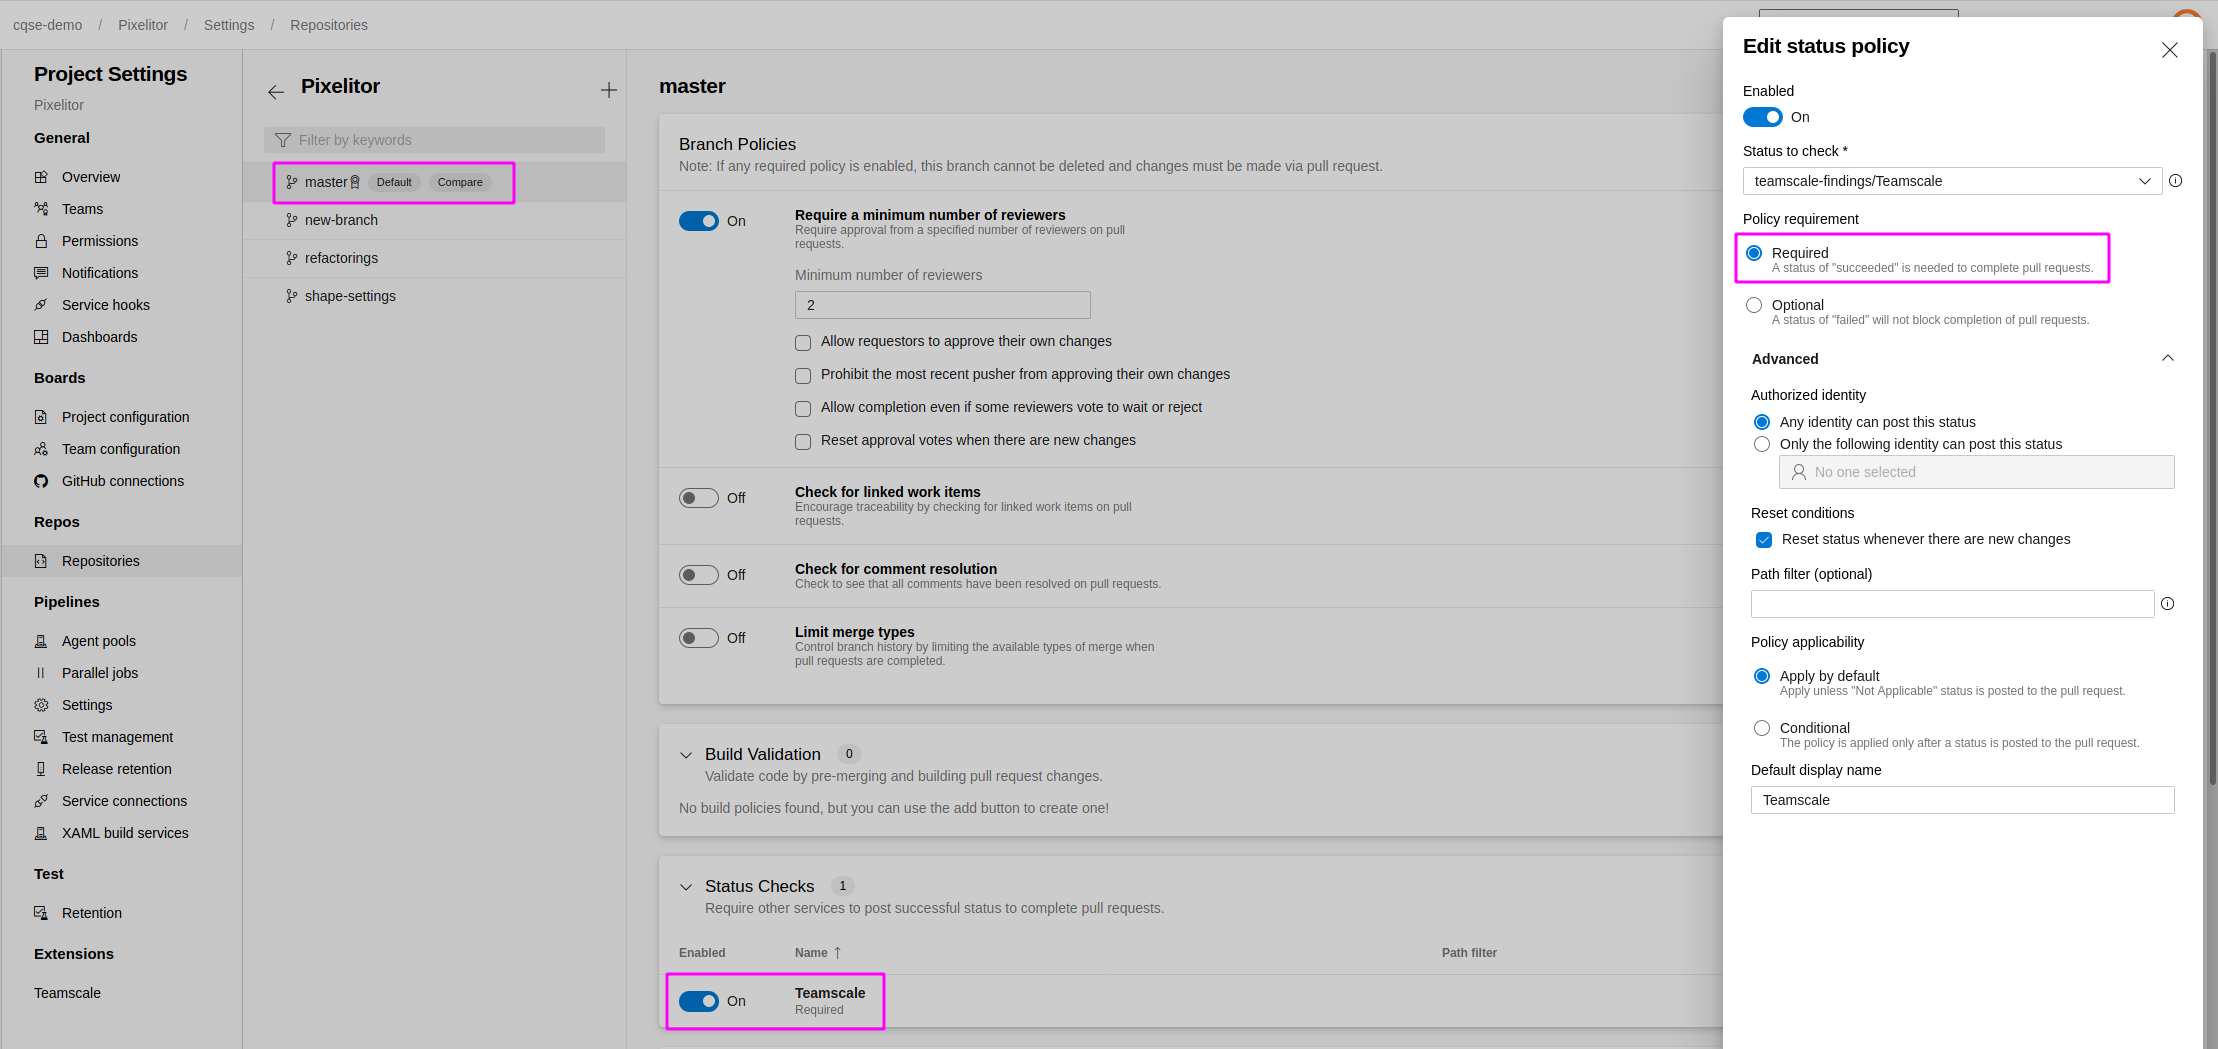 If Teamscale is configured to vote on pull requests, you can require that all findings are addressed before a pull request is merged:
In Azure DevOps, go to Project Settings > Repositories and select the repository connected to Teamscale.
Select Policies and the default integration branch, e.g.
master.Add a new Status Check and select Teamscale from the dropdown.
Manual Setup of Web Hooks
If there are restrictions, so that Teamscale cannot receive Azure DevOps web hooks or web hooks cannot be automatically created, please apply these advanced Teamscale configuration options. These prevent Teamscale from trying to create the webhooks which will otherwise cause Teamscale project validation to fail.
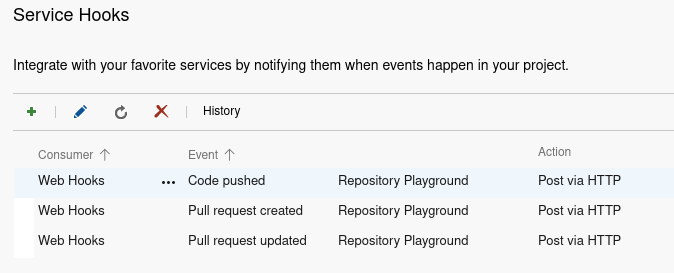
In case web hooks can be received but the user account Teamscale uses to access Azure DevOps does not have sufficient privileges to create the web hooks, the web hooks need to be manually created once by an Azure DevOps project administrator. Three web hooks need to be created for the following events:
- Code pushed
- Pull request created
- Pull request updated
To create these hooks:
In Azure DevOps, go to Project Settings > Service Hooks.
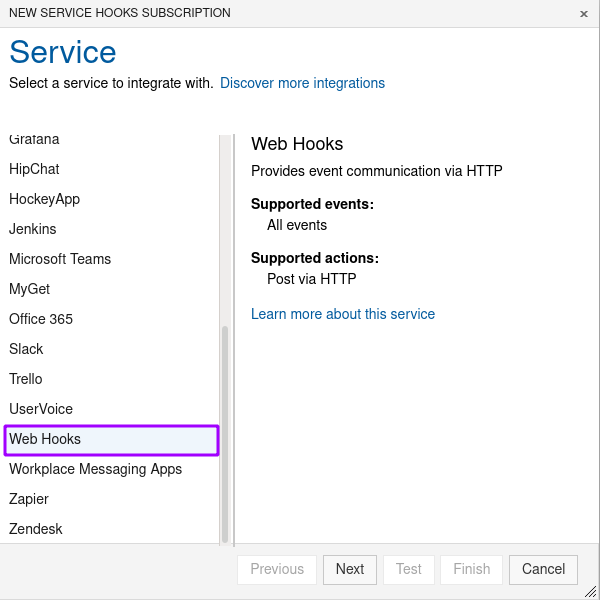
Click the PLUS icon in the top left and select Web Hooks as service type. Click Next.
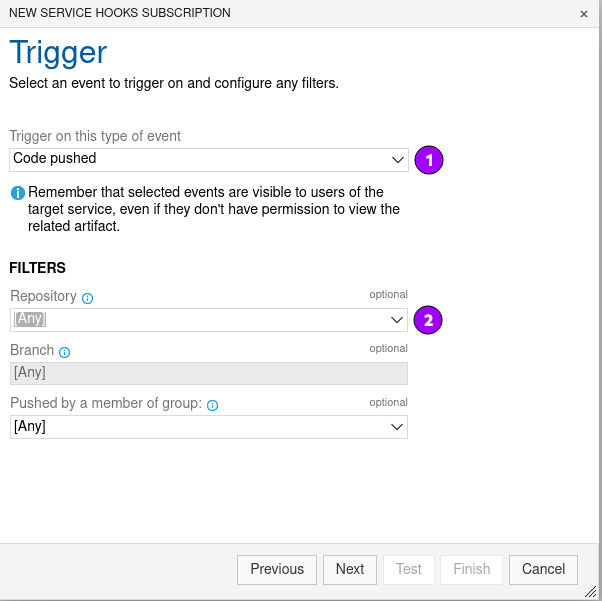
Configure the service hook trigger
- Select Code pushed as event type (1).
- Select the repository for which events will be triggered (2).
- In case the Azure DevOps project contains more than one repository, you either have to select [Any] to trigger events for all repositories, or you have to set up hooks for each individual repository separately.
- Click Next.
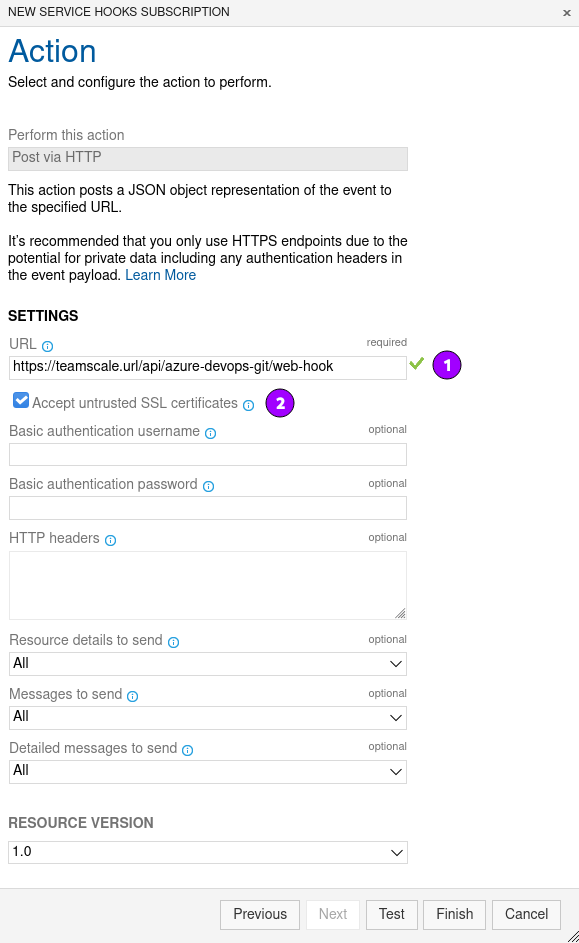
Configure the service hook action
- Enter the URL of the Teamscale web hook endpoint (1). The URL should be as follows:
https://{teamscale-url}/api/azure-devops-git/web-hook. - If you use HTTPS with a self-signed certificate, Accept untrusted SSL certificates should also be checked (2).
- Click Test to verify that the hook has been created successfully.
- Click Finish.
- Enter the URL of the Teamscale web hook endpoint (1). The URL should be as follows:
Repeat steps 2-4 also for event types Pull request created and Pull request updated.