Commit Activity View
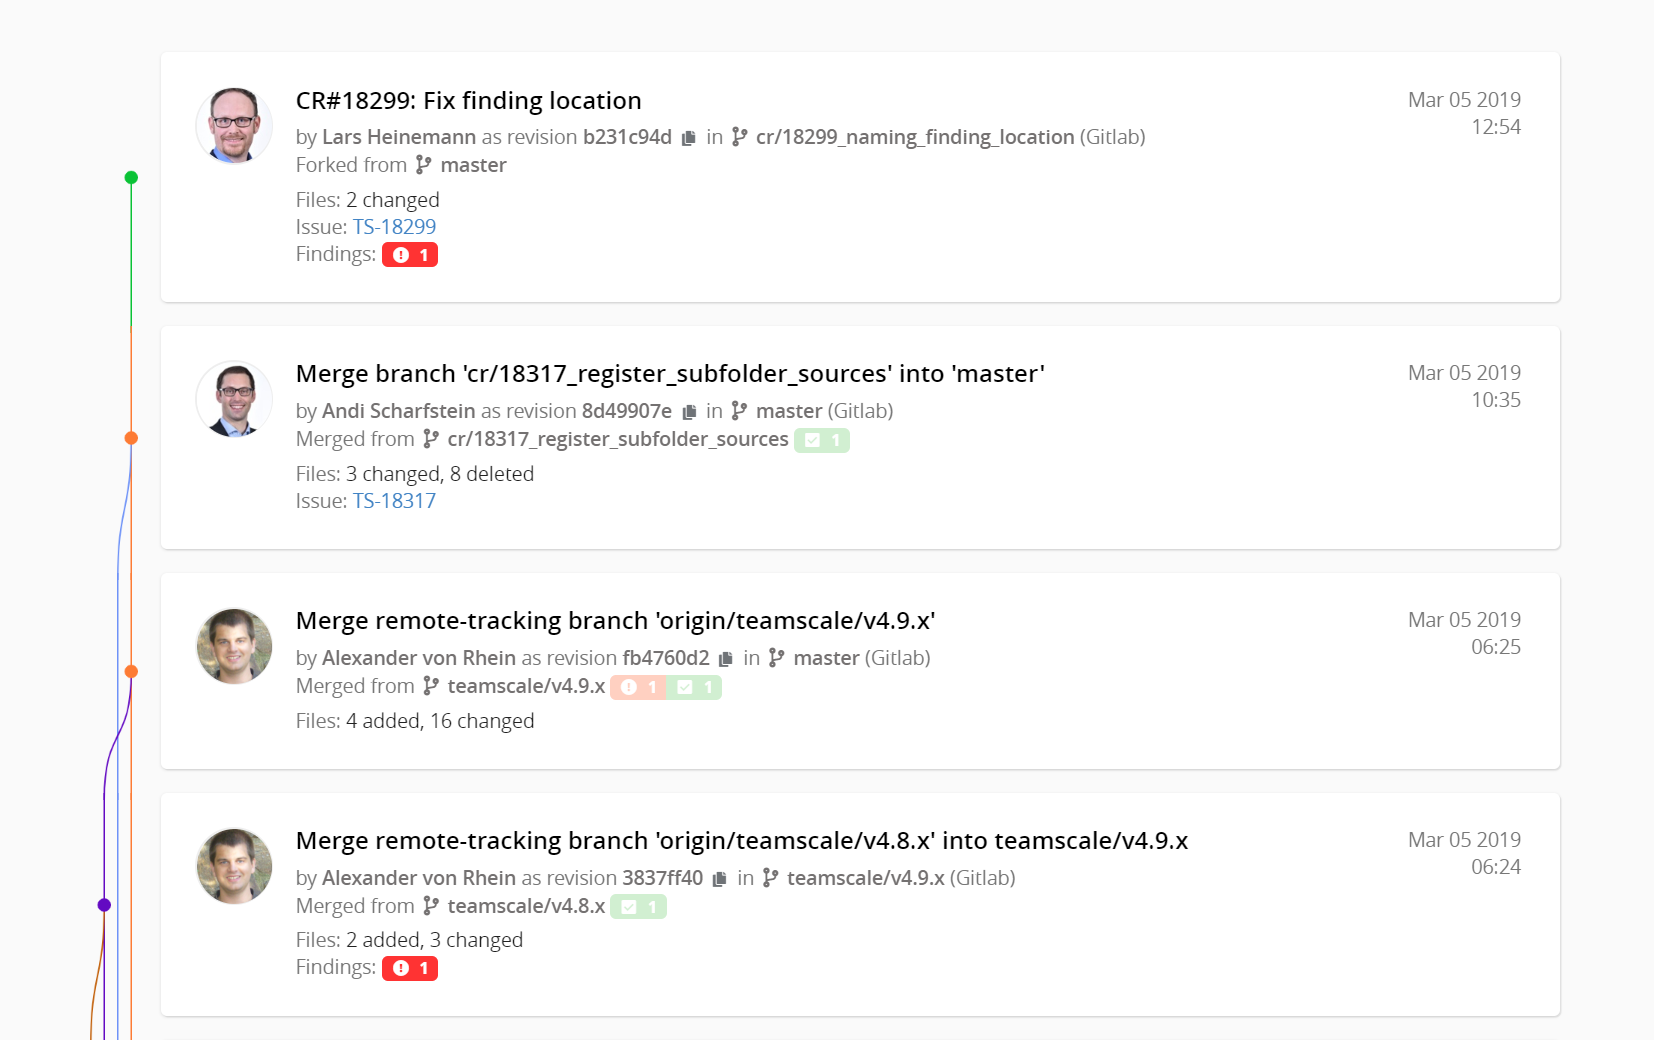
For projects with a connector to a version control system, the Activity perspective provides an overview of the history. When you open the Activity perspective, you will first see the Activity View:

The view visualizes each commit to the repository and offers seamless scrolling through the history. In the given example, branch support was enabled for the underlying Git repository. Hence, for the given branch, Teamscale shows all commits of all parents. The history of the branch and all branches that were merged into it is visualized on the left side of the commits.
TIP
Note that only changes performed on the scope of your Teamscale project (i.e. analyzed code files) are counted. The overall repository might, of course, have more changes.
Findings Churn Indicator
Alongside the typical commit information from the version control system, Teamscale shows for each commit a so-called Findings Churn Indicator.  The Findings Churn consists three numbers each representing the number of findings in the following categories
- Findings newly introduced with the commit (red)
- Findings in changed code, i.e. findings that are located in methods that were changed in the given commit. You can view this as opportunities to clean up existing code to gradually improve it over time (Quality goal Improving) (dark blue)
- Findings removed/resolved with the commit (green)
Alerts
Alerts indicate inconsistent changes to code clones, i.e. a change to a copied code section that was only applied to one of the copies. Such inconsistent changes may indicate bugs, as the code change may have to be also applied to the other code sections. Clone alerts make the developer aware of this special situation allowing them to check if the inconsistency is intended. Please note that the detection for inconsistent changes to clones only considers changes one week or longer after the initial introduction of the clone. This is intended to filter out consecutive code changes where it can be assumed that the developer is aware of the duplicated code parts they recently introduced and the change to them.

Repository Details
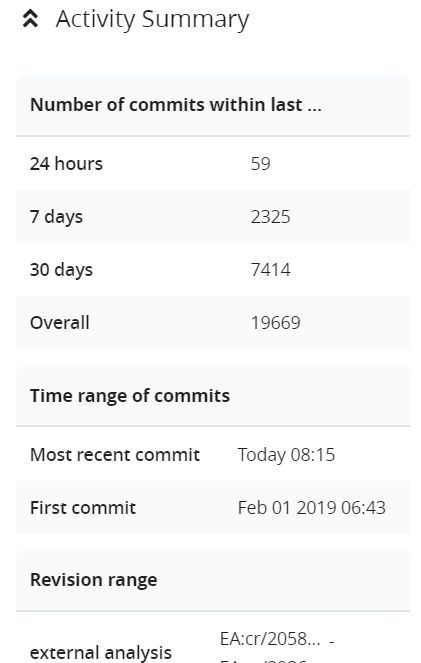
On the right side, you can click on Repository Details to inspect the details of the analyzed history:

This shows the number of changes performed on the repository within the last 24 hours or the last 7 days, for example. Additionally, the time range of the changes is indicated. The First change represents the first change within the history time interval as configured in your project configuration. For example, if your project's history dates back to the year 2000 but the project configuration indicates January, 1st 2016 as start revision, then you will see the latter as date of First change .
Action: Browsing the History
To browse the repository history, you can either just scroll through the list of commits or you can use the Timetravel feature to jump back in time. If you set your timetravel to January, 1st 2016, then all commits after this date will be hidden and your stream of commits starts with the last commit on January, 1st, 2016. From there on, you can scroll backwards again.
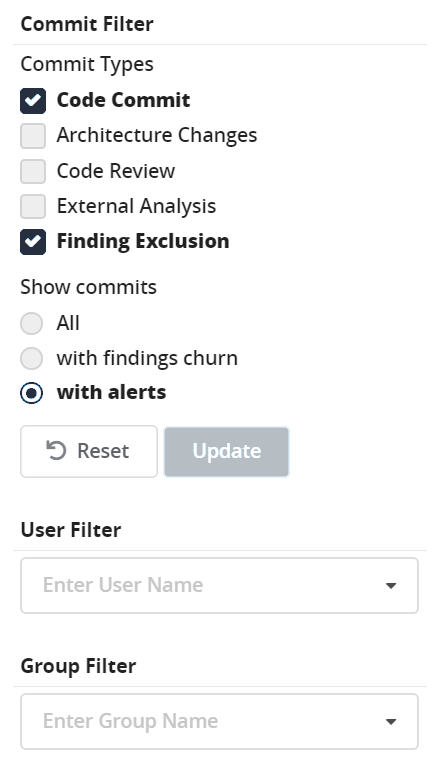
Additionally, several filter options are available to configure which commits are shown or hidden:

You can filter commits without findings churn or hide external upload commits.
The User Filter offers you to enter a user name. After entering the first letter, a drop down menu facilitates selecting the correct user. Afterwards, only commits from the selected user will be displayed.
Action: Inspecting a Single Commit
From the Activity View, you can also inspect single commits in more detail. As a short summary, the commit is already annotated with the findings churn, showing the impact of the commit on the system's quality. If you click on the commit message, you will be directed to the Commit View.
Commit View
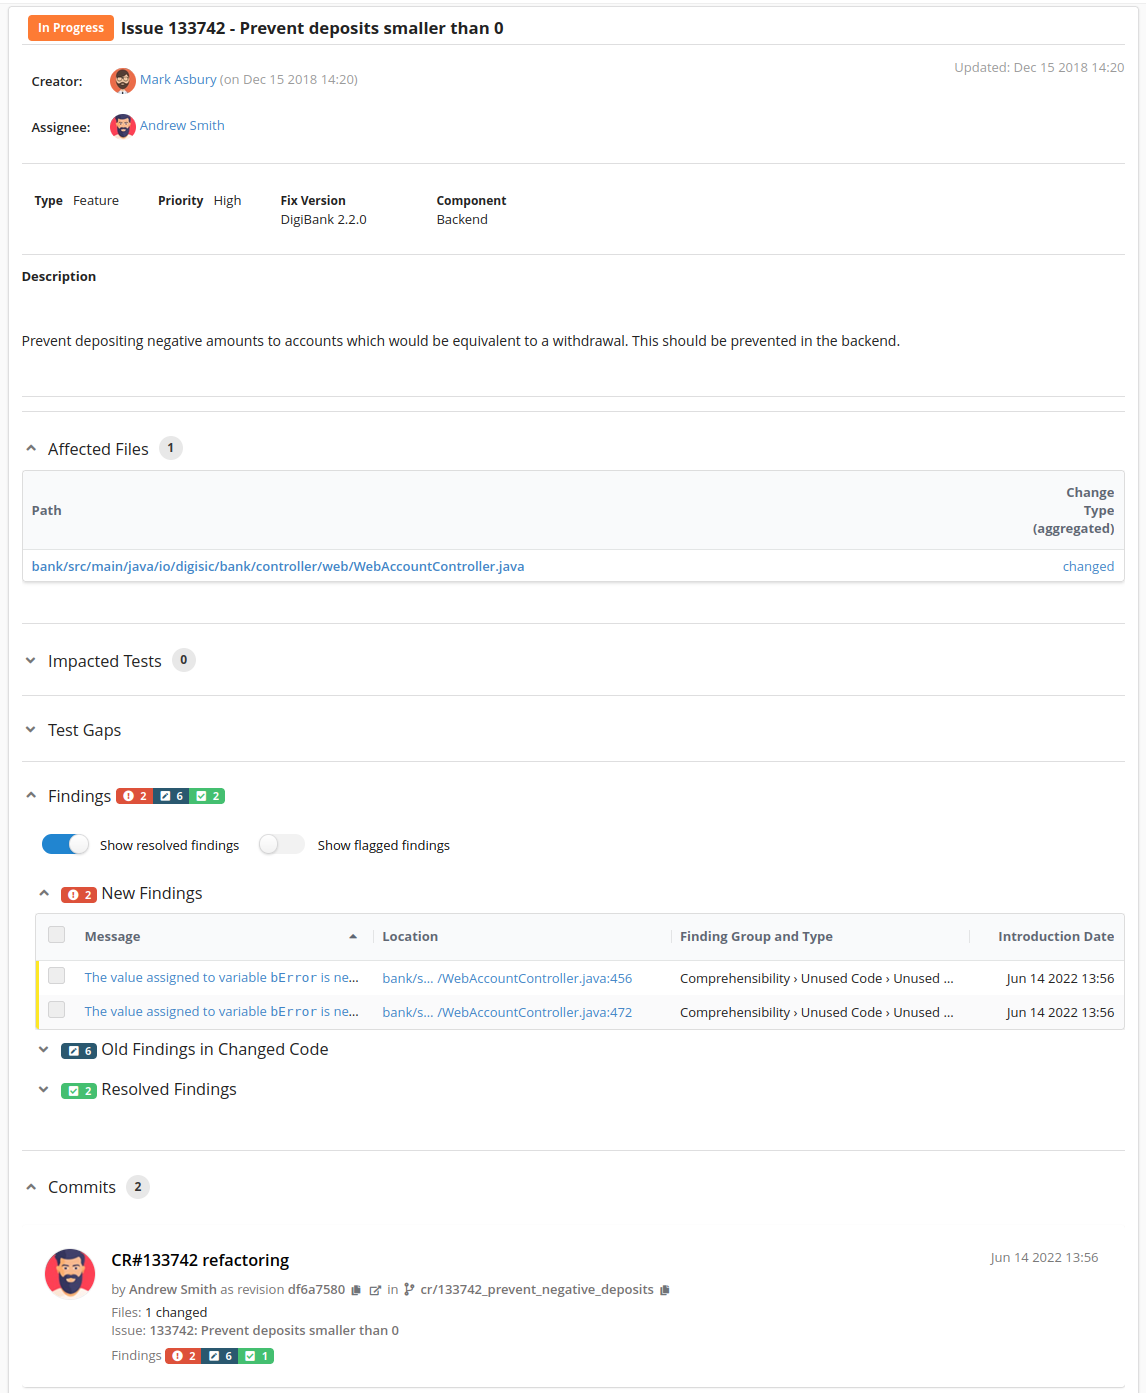
The Commit View repeats the information about the commit message, the author, the revision number and the branch (if branch support is enabled). Additionally, it links to a connected issue tracking system, if one has been configured. Following the link, you will see the Issue View as shown here:

From there, you can also navigate to the corresponding issue in the issue tracker.
Furthermore, the Commit View provides you information which files were affected by the commit:

The Change Type indicates you whether the file was added or deleted . If it was changed , you can use the link to jump into the Code Comparison View. This view will show you a comparison of the current version of the file and the oldest version prior to the commit. The view itself is part of the Metrics perspective.
Underneath the affected files, you can expand the Metric Changes to see the impact of the commit on individual metrics.

THe image shows the corresponding table. Furthermore, the findings churn of the commit is indicated by a list of new and removed findings:

You can either click on the message of a finding to jump into the Findings Detail View of the Findings perspective or use the link to the source code location to jump into the Code Detail View.
