How to Connect Teamscale to Bitbucket
Teamscale can connect to both the Bitbucket Cloud version and the Bitbucket Data Center (On-Premise) version.
General Option Reference
This guide only covers the options specific for the Bitbucket Cloud/Data Center repository connector. A general overview of connector options is available here.
Bitbucket Cloud Integration
Teamscale integrates with Bitbucket Cloud as a Bitbucket App. Prerequisites for the configuration are:
- Teamscale installation that can be reached from the Bitbucket Cloud instance you want to connect to.
- Bitbucket workspace used to register the Bitbucket App. Please note that this app needs to be installed on the workspace, so that Teamscale has access to all available repositories of your workspace.
To connect to Bitbucket Cloud, the following steps are needed:
Ensure that the Teamscale instance base URL is configured correctly.
In Bitbucket, navigate to the settings page of your workspace. Open Installed apps and click the link Install app from URL. You might also need to enable the development mode on the bottom of the page. Here you can provide the App URL to directly install the app.
- App URL: This is the public URL of your Teamscale installation followed by
api/bitbucket-cloud/app/install. So for the sample Teamscale URL https://teamscale.example.com, this would be https://teamscale.example.com/api/bitbucket-cloud/app/install.
- App URL: This is the public URL of your Teamscale installation followed by
After clicking Install, the app will request access to Bitbucket. Click Grant access. You will get a message that the app has been successfully installed and will appear in the list of installed apps.
No Automatic Project Mirroring
Note that Teamscale projects are not automatically created, but rather have to be created as needed using the Bitbucket connector after the app has been installed.
Set the repository name option in the connector to projectKey/repoSlug.
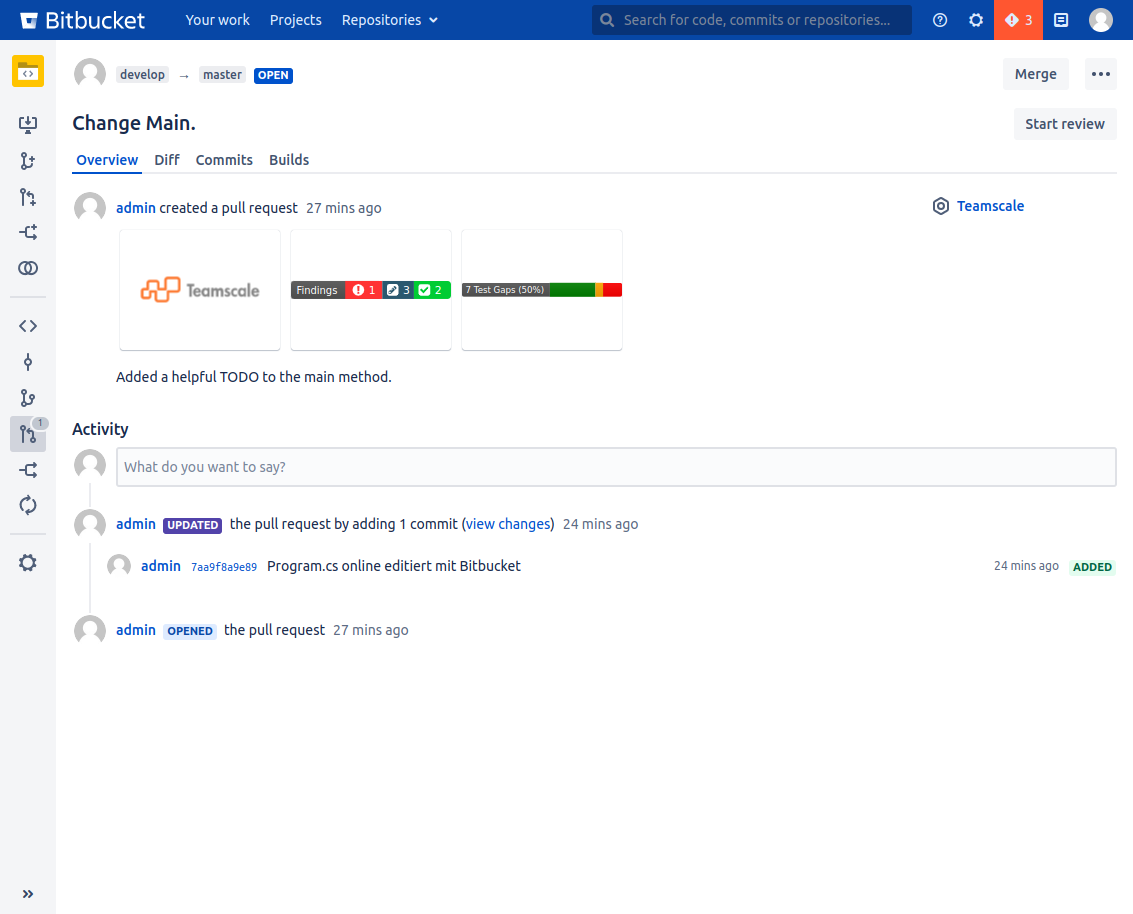
Teamscale will add findings as in-line code annotations. Each annotation created by Teamscale is associated with a quality report.
Example: Annotations are created for findings. 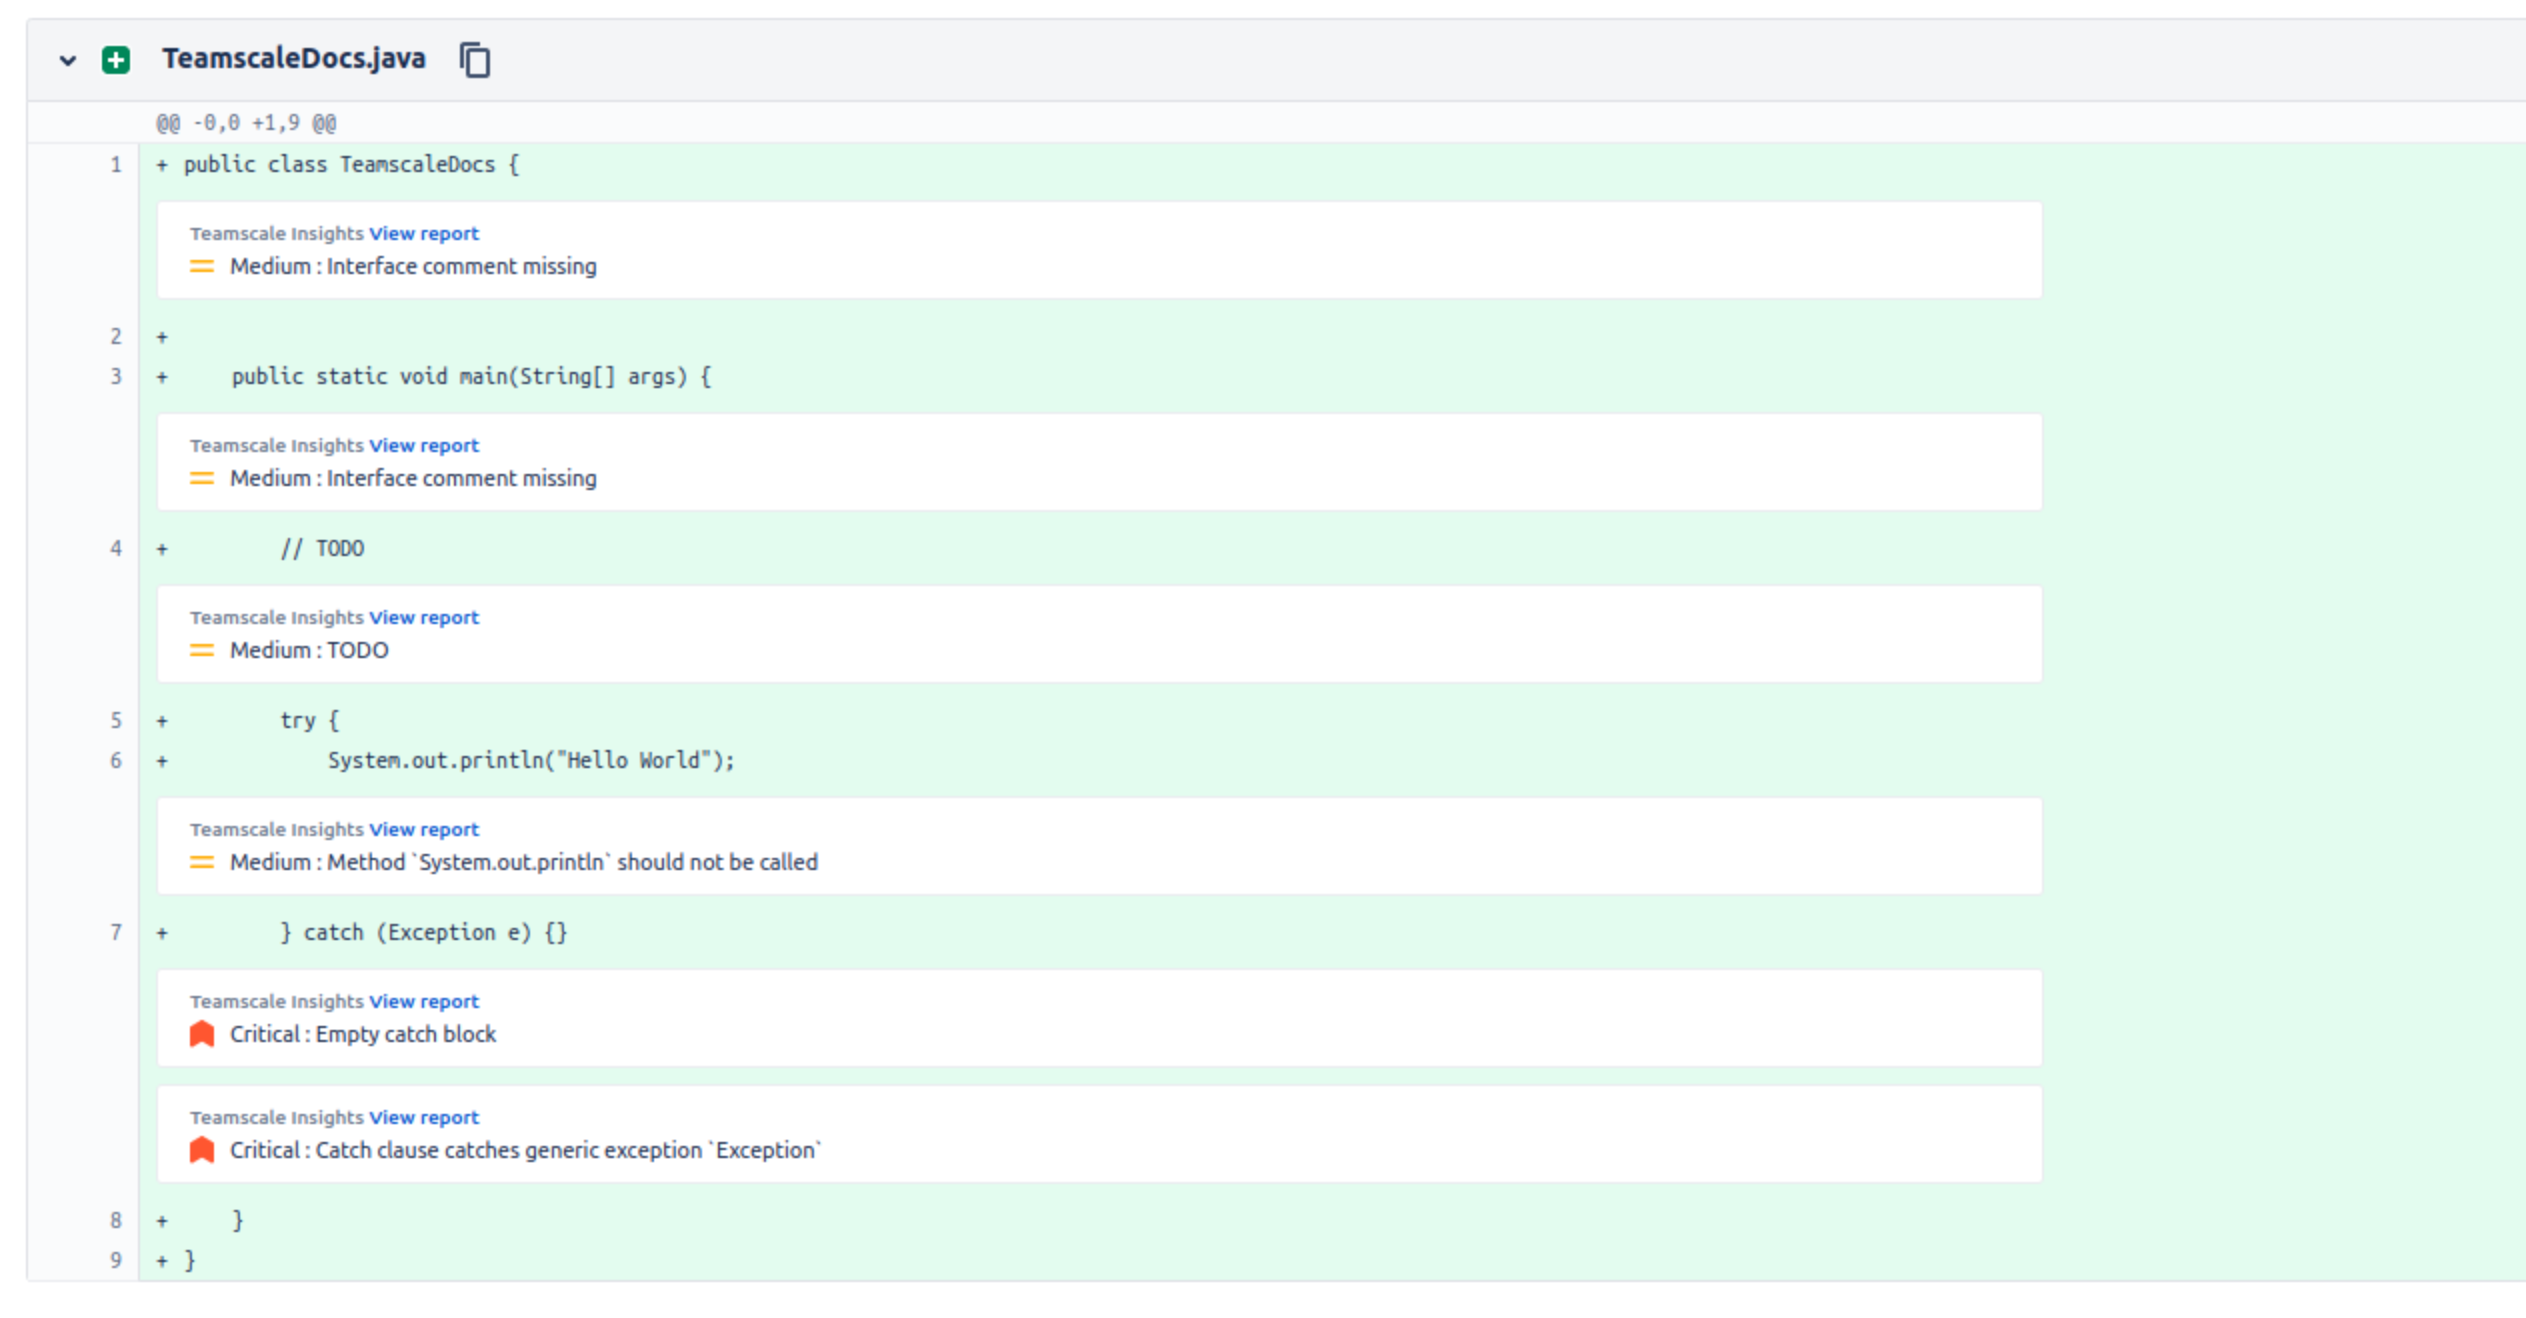 The quality report shows all associated findings.
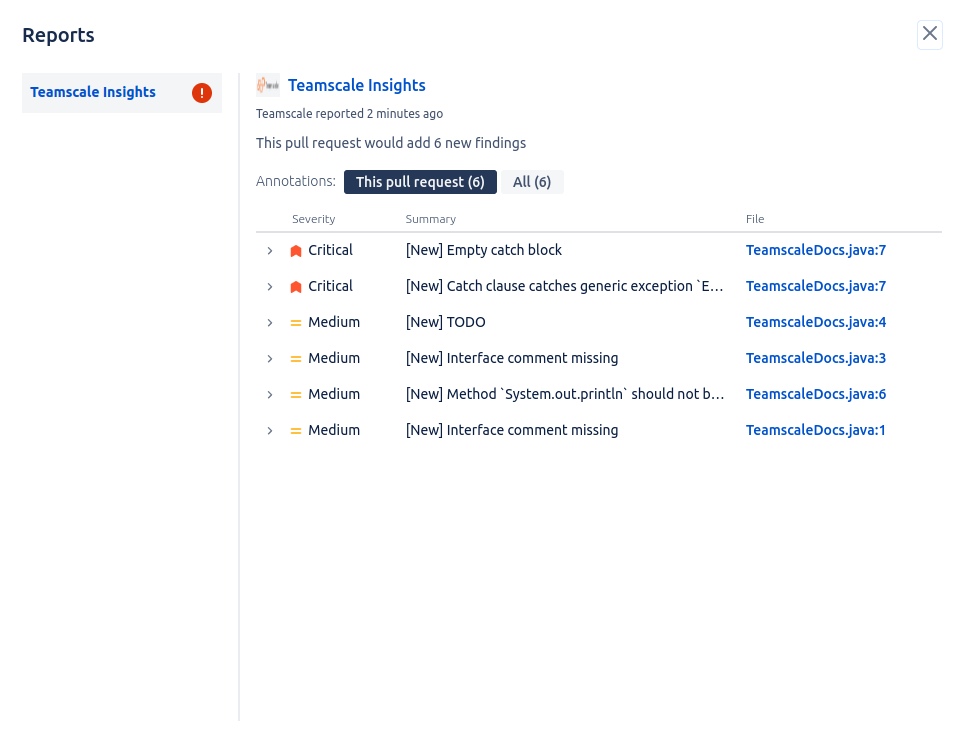
When testing Teamscale on a local laptop or during initial setup, a service for exposing local ports on the internet can be helpful. One such service is ngrok.
Bitbucket Data Center (On-Premise) Integration
Teamscale integrates with Bitbucket Data Center (On-Premise) using the available API and webhooks.
Bitbucket Server Integration
Teamscale still supports Bitbucket Server as well. The minimum required Bitbucket Server version for the integration to work is 7.0.0.
To connect a project to code from a Bitbucket project, you don't need to install plugins in Bitbucket or change admin settings. You just need to follow these steps:
Ensure that the Teamscale instance base URL is configured correctly.
Select the
Bitbucket Data Center (On-Premise)connector during project creation.Select or create an account for the Bitbucket Server. The account's fields should be filled out as follows:
- URI: Bitbucket Server's root URL (e.g.,
https://bitbucket.example.com). - Username and Password/Access Token depend on the authentication mode:
- Basic authentication:
- Username: The username of a user who has admin permissions for the repository.
- Password/Access Token: The user's password or personal HTTP access token with at least Project read and Repository admin permissions.
- Bearer authentication:
- Username: Must be empty.
- Password/Access Token: An HTTP access token with at least Project read and Repository admin permissions.
- Basic authentication:
- URI: Bitbucket Server's root URL (e.g.,
Complete project creation as usual, by providing the full name of the Bitbucket repository and completing any other required fields. The name should be in this format
projectKey/repoSlug.
HTTP Access Tokens in Bitbucket Data Center
There are three different types of HTTP access tokens: personal access tokens that belong to a user, repository access tokens and project access tokens that allow access to a specific repository or project. To obtain an access token in Bitbucket, select the HTTP access tokens page from
- your user's Manage account page for a personal access token.
- the repository's settings page for a repository access token.
- the project's settings page for a project access token.
As the first step in project creation, Teamscale will register its webhook with the project. After this, Teamscale will automatically be informed about events in the project, such as pushes to the repository and changes to any pull requests.
Code Annotations
For Bitbucket, Teamscale will add findings as in-line code annotations. Each annotation created by Teamscale is associated with a quality report.
In Bitbucket Data Center, if a pull request already contains reports from other tools, Teamscale adds the prefix Teamscale to its code annotations.
Example: An annotation is created for a finding. 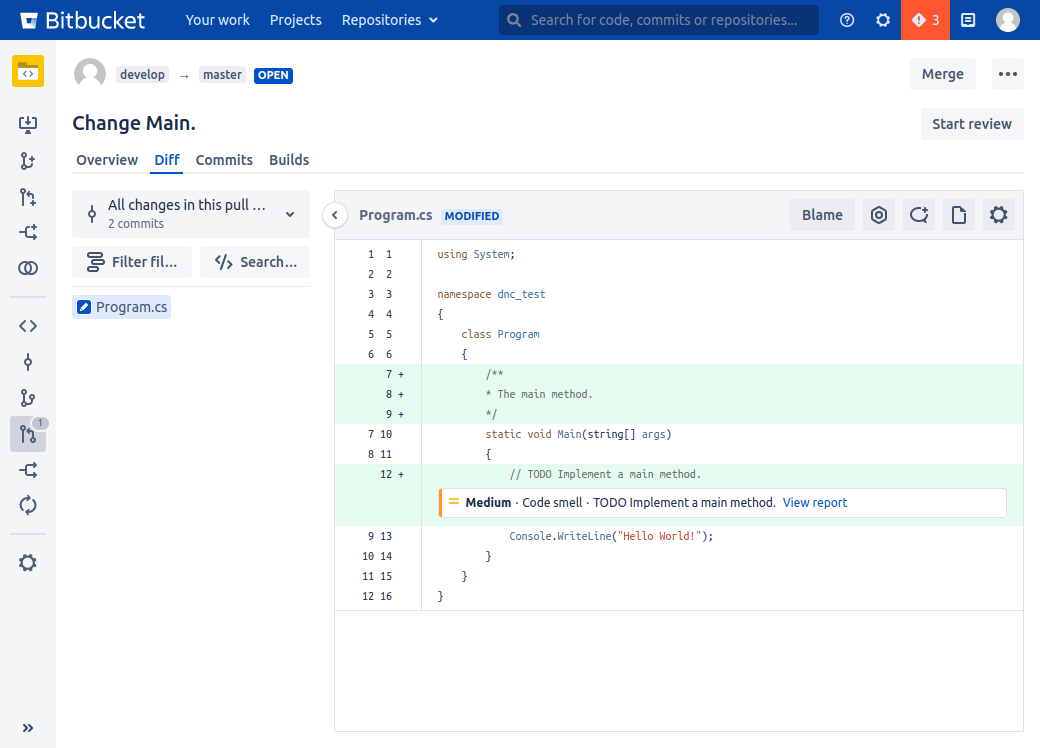 The quality report shows all associated findings.
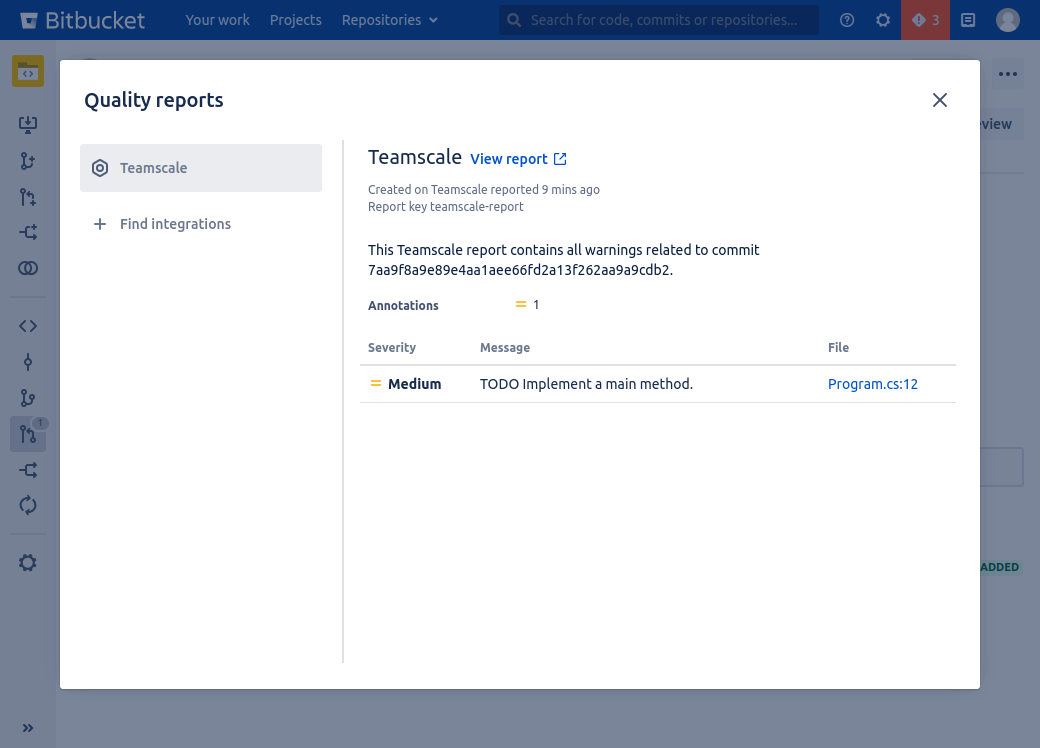
Required Permissions
It is required that the technical user has admin permissions for the repository. These permissions are needed for Teamscale to automatically create the necessary webhooks in the Bitbucket repository.
In case administrative rights cannot be granted to the technical user, please do the following:
- Disable automatic webhook creation by setting the corresponding expert option of the repository connector. You can also set the default of this option for new projects by passing the following JVM argument on the start of Teamscale:
-Dcom.teamscale.mergerequest.disable-automatic-webhook-creation-default=true - Manually create the necessary webhooks in Bitbucket.
Even if the technical user may not be granted administrative rights or if they are taken away after the initial webhook setup, the user still requires write permissions. These permissions enable Teamscale to edit pull request descriptions. If the user lacks these permissions, Teamscale may not enhance pull requests with finding information.
Manual Creation of Webhooks
In case the technical user does not have administrative rights, you will need to manually create and configure webhooks in the Bitbucket repository.
- Open the Bitbucket repository you want to add the webhook to.
- From Repository settings, click Webhooks.
- Click the Create webhook button.
- Configure the webhook as follows:
- Name: Enter any name for the webhook (e.g. "Teamscale Webhook").
- URL: Enter the URL of Teamscale's Bitbucket endpoint. It should be in the following format:
{Teamscale_baseURL}/api/bitbucket-server/web-hook - Events: Select the following events:
- Repository: Push
- Pull request: Opened, Source branch updated, Modified, Merged, Declined, Deleted
- Click Create.
TIP
If there are restrictions, so that Teamscale cannot receive Bitbucket webhooks, please apply these advanced configuration options.
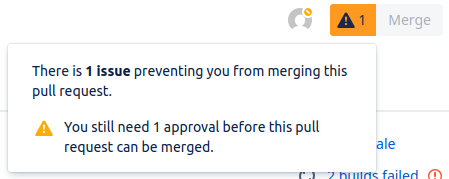
Blocking Pull Requests using Teamscale
Although blocking the merge of pull requests in case of findings or test gaps is not recommended in general, it is possible to configure such a "quality gate" using the Bitbucket Server Options. In some cases, a soft quality gate that can be overruled by the developers of a project is necessary. For example, there often are test gaps that are neither worth the effort (time- or resource-wise) nor relevant given the context of a pull request that otherwise would block the merge.
To achieve such a soft quality gate, you have to enable the options
- Enable Test Gap Integration for Merge Requests,
- Enable Voting for Findings / Test Gaps /Test Coverage and
- Enable pull request review (expert option)
in the Teamscale project configuration. Additionally, you have to enable Bitbucket's merge check "Minimum approvals" with a minimum number of approvals of the currently required number +1. If it is necessary to overrule the review posted by Teamscale, an additional reviewer can give the required missing approval.
Alternatively, it is possible to enable Bitbucket's merge check "All reviewers approve" and remove Teamscale's review manually in case it should be overruled.